Showing posts with label gift. Show all posts

Tuesday, January 28, 2014

Teacher Gift: Class Signature Quilt

I've been so bad about posting all my quilt finishes recently.  I don't want to forget this signature quilt, because I love this idea for a teacher appreciation gift!  The customer convinced all the parents in her child's kindergarten class go in together for a gift.  Rather than everyone buying a small (and often rather useless) gift, they all went in together on these awesome quilts!  The customer picket out and bought the frog fabric.  Then she secretly had all the kids in her child's kindergarten class sign it in two different places with a fabric maker, then sent it to me. 

To assemble the quilt, all I did was add borders with corner squares.  I wanted the focus to stay on the center panel and the adorable 5-year-old signatures, so I kept the piecing simple and used solids for the border.  After basting, I added teacher's name and the year with fusible web.  Then I appliqued with a zig-zag stitch. 
I outline-quilted the border and corner squares.  I also highlighted all the signatures with quilted boxes.  Then I decided it needed more quilting, so I outlined some of the fun frogs, too.

I love how the outlined signatures turned out! The back really shows off the effect of the random-box quilting:

I also made a similar wall-hanging sized quilt for the teacher's aid the same way as the larger quilt.  I just added hanging tabs, and did a turn-out and topstitch finish on the edges rather than binding. 


Monday, December 17, 2012

Drawstring Bag Tutorial

 Ok, I'm officially in Christmas panic mode.  I still haven't finished shopping, I have tons of holiday baking to do, I haven't started wrapping, and I'm still sewing gifts...

 Yesterday I was whipping out several sets of my drawstring bags.  They make great gifts--quick to sew, super cute, and actually useful.  They fit perfectly over a mason jar, which is great for giving homemade goodies.

 As I was sewing, I realized I'd made the tutorial more complicated it needed to be.  There were several steps that I could simplify and make these even easier to make, so I thought I'd post an updated tutorial.
 What you need:  (for one drawstring bag)
  • 11 x 15 inch rectangle for outside, Fabric A 
  • 11 x 15 inch rectangle for lining, Fabric B
  • 5" diameter circle of Fabric B
  • 5" diameter circle of Fabric A
  • 24 inch piece of 1/2 inch ribbon
  • Thread to match
 Let's get sewing:  Use a 1/2" seam allowance.  In the photos, I'm sewing a blue bag (Fabric A) with a white lining (Fabric B)


1.  Fold both rectangles in half, right sides together, so you have 11 x 7.5 in. rectangles.

Pin the long sides at 2 inches and 1/2 inches from the ends as shown in the photo.  (I use color-coordinated pins.  I start at white and end at red.)  Sew between the pins, backstitching at both ends.


2.  Pin and sew the circle pieces to the rectangles, right sides together, to the ends with the 1/2" opening.  You can either match the bottoms, or you can swap your circles like the yellow and brown polka dot bag shown above.

3.   Turn Fabric A right-side out, then slip it inside your Fabric B. (You won't have a hole in your lining, just ignore that)

4.   Line up the top edges and the side seams.  Sew around the top edge, starting and stopping 1/2" from the V-shaped slit.


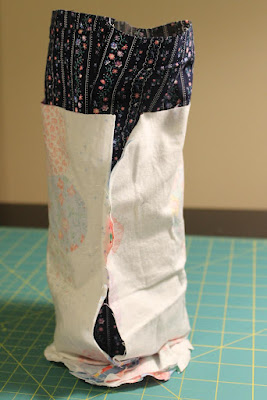
5.  Turn out through the V-slit.   Your bag should look like this:

6.   Tuck your Fabric B into Fabric A.  Tuck the V-slit edges under 1/2".  Topstitch 1/8" from the edge to close the opening.

7.   Fold down the top of the bag 3/4" to form the drawstring casing.  Remove the tray on your sewing machine and slide the bag over the end so you can easily sew the casing.  Topstitch 1/8" from the edge.

8.   Use a safety pin to thread the ribbon through the casing.  Make sure it isn't twisted, then knot the ends together.  Snip the ribbon ends at a diagonal, and you're finished!  

 -Lily

Linked up at some of the great blogs on my sidebar!

Monday, November 12, 2012

Simple Pillow Cover Tutorial

 When I started sewing, I wanted to make some custom pillow covers for our couch.  But, I was so intimidated by the buttons, snaps, zippers, and piping that pillow patterns always have. Then I discovered how simple pillow covers can be.  You can add all the cute extras if you want, but if you're a novice sewer like I was, you just want a simple, square pillow cover.

What I discovered was an envelope pillow cover.  The front is just a square, and the back is two flaps of fabric, so you can slide your pillow form in and out.  This style is great because it's cute, simple, and it can be removed and washed in case of a baby goo emergency.
What you need:  for a 16" pillow cover:
  • 16.5" square of fabric for the front
  • 2 pieces of backing fabric, 16.5" x 14" and 16.5" x 26"

  Let's get sewing:

1.  If you're using a simple square of fabric for the pillow front, skip this step.

I pieced and quilted a log cabin block instead of using a plain piece of fabric for my pillow front.  I made a 17" log cabin square, basted it with batting and white fabric, then I quilted a square spiral and trimmed it to 16.5" square.

 2.  Now, attach the back flaps to the pillow front.  I did some patchwork on one of the back flaps, but you can also solid pieces of fabric.

Press both pieces in half, right sides out.  You should now have two pieces, 16.5" x 7" and 16.5" x 13".

3.  Pin the 13" piece to the right side of the pillow front, aligning the raw edges.  If you did patchwork for the backing, make sure that your favorite part is facing the pillow front.

Pin the 7" piece to the other side of the pillow front, aligning the raw edges.  The back flaps should overlap about 3".

Detail of the back flaps overlapping.

 4.  Sew around the square with a 1/4" seam allowance.  If you'll be washing your pillow cover a lot, I'd use a triple stitch so it's more secure.  Backstitch at the beginning and end.

Flip it right-side-out, and you're done!
-Lily
Linked at some of the great blogs in my sidebar!

Monday, November 5, 2012

Hanging Kitchen Towels Tutorial

I love hanging towels in my kitchen, they look so much nicer than just shoving a towel through the stove handle.  Plus, my one-year-old thinks it's a really fun game to pull the towels off, and then Mommy puts them back up, then he pulls them down...all day.

I've seen a couple different versions of hanging hand towels recently--some with buttons, crochet loops, and other options, but I wanted to make some that could tie on and make a cute little bow.
These are cute, practical, and simple to make, so they would make perfect Christmas presents.  I made these for me, but I'll probably be making a few more sets as we head into the holidays.

What you need: for 2 hanging towels
  • 1 kitchen towel
  • 2 pieces of main fabric, 6.5 x 9"
  • 2 pieces of batting, 6 x 8"
  • For the ties, 4 pieces of bias tape, 18" each (or cut 1.5 x 18" strips and see straight-grain "bias tape" tutorial)
Let's get sewing:
1. Cut your towel in half so you have 2 pieces, 13 x 16" each.

2.  On the raw edge, make a large pleat in the center of the towel, so that the top of the towel measures 6" across.  Lay the pleat flat and pin.  Baste 1/8" from the edge to secure the pleat.

3.  On main fabric piece, press under short edges 1/2".  Fold in half, short ends together.  On the fold, mark 1" in from both sides.  Cut from the mark to the bottom edge.  Repeat on the other side.  You should have a trapezoid.

4.  Cut your batting the same way you cut your fabric in step 3.  Open your trapezoids and center the batting on the wrong side.

5.  Fold the batting and trapezoid over the pleated towel edge.  Sew 1/4" from the edge.  I used a triple-stitch to make it secure, since the towel hangs on this seam.  Make sure to catch the front and back of your fabric.

6. Quilt the fabric panel.  Here's a close-up of a finished towel so you can see one of the quilting patterns I did.  One set has concentric trapezoids, and the other has parallel lines about 1/2" apart.

 7.  Open your bias tape (or straight-grain tape, like I used.)  Press both short ends in 1/2".  Lay the open tape on the back of the main fabric.  Align the pressed short end with the top of the towel and align the raw edge to the main panel raw edge.  Baste the raw edges together 1/4" from edge.

8.  Now, fold the tape over  to the front of the main fabric.  Pin the tape in place.  Sew 1/8" from the edge, attaching the tape along the fabric edge, then continue along the tape to form the tie.

 You should now have a towel that looks like this!  Repeat steps 2-8 to make your 2nd towel.


-Lily

Link party some of the great blogs on my sidebar.


Friday, September 14, 2012

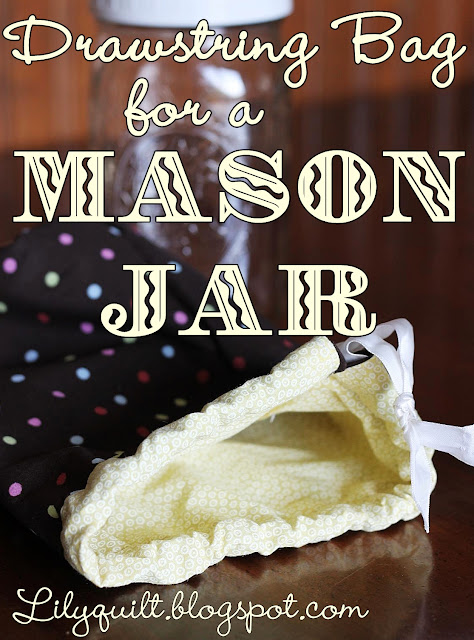
Drawstring Bag for a Mason Jar -- Pattern and Tutorial

I made this set of gift bags for my mother-in-law who loves to drink kefir everyday.  (If you don't know what that is, it's like really strong yogurt.  Here's one recipe to make it.  I haven't decided if I like it or not.)  She makes the kefir in a mason jar, and it has to be kept in the dark.  Until now, she's been wasting rolls of aluminum foil, wrapping it all around the jar.  But for her birthday, she'll get these super-cute drawstring bags to use instead!

I think they'd also be perfect for gift-giving.  If you're making homemade salsas or mixes in mason jars, a handmade gift bag would be perfect!

**I posted a better, updated tutorial of these drawstring bags**


What you need:
  • 11 x 15 inch rectangle of two fabrics, A and B
  • 6 inch square scraps of two fabrics
  • 24 inch piece of 1/2 inch ribbon
  • Thread--I used white quilting thread, but Coats and Clark All-Purpose would work too.

What you do:

Note:  use a 1/2" seam allowance.
 
1.  Make a circle pattern for your bag bottom.  It needs to be 5 inches in diameter--you can use a compass, or just trace a lid or bowl with that measurement.  I used muslin for my pattern piece so that I didn't have to draw on my fabric.  Pin to both 6 in. pieces and cut out.


2.  In the photos, I'll be sewing a blue bag (Fabric A) with a white lining (Fabric B).  First, fold your Fabric A in half, right sides together so you have an 11 x 7.5 in. rectangle.

Pin the long side at 2 inches and 1/2 inches from the ends as shown in the photo.  I use color-coordinated pins.  I start at white and end at red.  Now, sew between the pins, backstitching at the start and end. 


3. Fold your lining (Fabric B) in half to form an 11 x 7.5" rectangle.  Refer to the picture--starting at one short end, place pins at 2", 4", 8", and 10 1/2". 

(I know, I cut my rectangles too small, so the last pin in the pic is at 10")


Pins placed to sew two short sections in the side seam.


4.  Leave 2" open at the top, then sew between the first two pins.  Leave 4" open, then sew about 2" closed.  Stop 1/2" from the end. 
After sewing the lining, you should have 2" open at the top, 4" open in the center, and 1/2" open at the bottom.

5.   Pin the bottom piece to Fabric B, right sides together, to the end with the 1/2" opening.   


6.  Sew around the circle.  Don't worry if your seam allowance isn't exactly 1/2", because mine wasn't.


7.  Now clip your seam allowance every 1/2", about 1/4" slits.  Make sure not to clip the stitches!


8.  Repeat steps 5-7 to attach bottom to Fabric A.

9.  Turn Fabric A right-side out, then slip it inside your Fabric B. 


10.  The two fabrics should be right sides together.  Line up the top edges and the side seams.  Pin the top edges together--notice my red pin!  Sew around the top edge; start and stop 1/2" from the V-shaped slit.


11.  Turn out through the 4" opening in Fabric B.  Your bag should look like this:


12.  Tuck in the edges 1/2" and pin the 4" opening in Fabric B.  Topstitch 1/8" from the edge to close the opening..


13.  Now, tuck your Fabric B lining into Fabric A.  Ta-da, now it's starting to look like a cute bag.  You're almost done, we just have to make the casing for the drawstring.

First, tuck in the edges of the V-slit 1/2" and pin.


14.  Topstitch the V-slit 1/8" away from edges.


15.  Fold down the top of the bag 3/4" to form the drawstring casing. 


16.  Remove the tray on your sewing machine and slide the bag over the end so you can easily sew the casing.  Topstitch 1/8" from the edge to form a 3/4" casing for the drawstring. 

17.  Use a safety pin to thread the ribbon through the casing.  Make sure it isn't twisted, then knot the ends together.  Snip the ribbon ends at a diagonal.  Finished!


-Lily