Showing posts with label decoration. Show all posts

Monday, November 19, 2012

Advent Calendar Tutorial

Sometimes, projects can sit around waaaay too long.  For example, I started this advent calendar last November...and I just finished it.  But, it's the end result that matters, right?  And it did turn out really cute, so I'm glad I didn't try to rush it.  Don't be alarmed, it's a pretty simple project.  About 98% of the time I took to finish it was spent procrastinating.  
Now all I have to do is make a felt marker to move from pocket to pocket.  Hopefully that doesn't take me until next Christmas!  (Update: Check out the tutorial for the felt star and baby Jesus markers I made)

What you need:
  • 1 main fabric, 24 x 22 inches
  • 1 backing fabric, 24 x 22 inches
  • 1 piece of batting, 24 x 22 inches
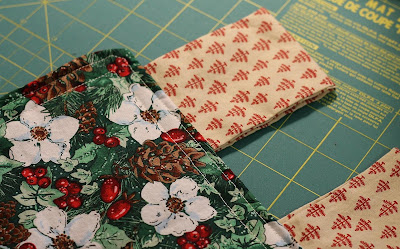
  • 4 pieces of fabric 8 x 8 inches, for the tabs.  I don't recommend a directional fabric, or you might have upside-down trees like me, oops.
  • 5 pieces of white fabric, 9 x 20 inches, for the pockets
  • Red felt
  • White and green embroidery floss
Let's get sewing:  I used all-purpose white thread and a 1/2" seam allowance.

1.  First, make the pockets.  I decided it was a lot easier to make 5 long pockets and divide them with quilting lines, rather than sew on 25 separate pockets.  Fold your rectangles in half, right sides together, so that you have 4.5 x 20" rectangles.  Sew around the 3 open edges, leaving a 3" opening for turning.  Clip your corners (see pic) so they'll lay flat when turned out.
Turn out the pockets, press, and topstitch 1/8" and 1/4" away from the folded edge.

2.  Next, make the tabs.  Fold the squares in half, right sides together.  Sew along the open long side of the rectangle formed.  Turn out and press. 

3.  Place your backing and main fabrics right sides together, and place the batting on top.  Pin the the tabs along a short end.  Place between the main and backing fabrics, aligning the raw edges.  Place the two outer tabs 1" from the edge and leave about 2.5" between tabs.

Sew around all four edges, leaving a 5" opening in the bottom for turning.  Turn out, then topstitch 1/4" and 1/2" away from the edge.

Your calendar should now look like this:

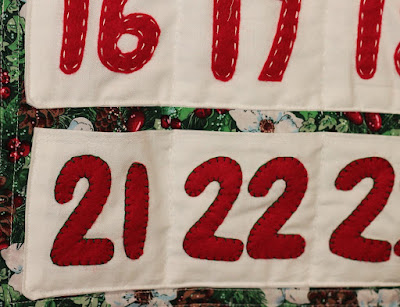
4.  Cut out 40 1.5 x 2.5" rectangles from red felt, then cut out all the numbers by hand.  (I started with rectangles because it helped me keep the numbers a consistent size.)

5.  Lightly mark the pockets about every 3 3/4"--that's where the dividing lines for the pockets will be.  Use these lines to help center your numbers.

I couldn't decide whether to use white or green thread, a running or blanket stitch, so I used all of them to attach my numbers.  You can use your preferred hand stitch, or even attach the numbers by machine.  I used 2 strands of embroidery floss.

6.  Now attach your pockets to the calendar.  Note that in my pic, I don't have the numbers attached.  I added them after sewing the pockets to the calendar, which I think was a bad idea.  It was really hard to get my needle in and out behind the pocket without sewing through the main fabric.  If I did this again, I would attach the numbers first, then attach the pockets second.

Pin your pockets on the calendar and topstitch along three edges to attach, leaving the top of each pocket open. 

7.  Using your marks as a guide, topstitch about every 3 3/4" to form pockets.  I did this with hand-quilting, but you could also use a machine.
Have fun counting down and preparing for Christmas!
-Lily

Linked up at some of the great blogs on my sidebar

Monday, November 12, 2012

Simple Pillow Cover Tutorial

 When I started sewing, I wanted to make some custom pillow covers for our couch.  But, I was so intimidated by the buttons, snaps, zippers, and piping that pillow patterns always have. Then I discovered how simple pillow covers can be.  You can add all the cute extras if you want, but if you're a novice sewer like I was, you just want a simple, square pillow cover.

What I discovered was an envelope pillow cover.  The front is just a square, and the back is two flaps of fabric, so you can slide your pillow form in and out.  This style is great because it's cute, simple, and it can be removed and washed in case of a baby goo emergency.
What you need:  for a 16" pillow cover:
  • 16.5" square of fabric for the front
  • 2 pieces of backing fabric, 16.5" x 14" and 16.5" x 26"

  Let's get sewing:

1.  If you're using a simple square of fabric for the pillow front, skip this step.

I pieced and quilted a log cabin block instead of using a plain piece of fabric for my pillow front.  I made a 17" log cabin square, basted it with batting and white fabric, then I quilted a square spiral and trimmed it to 16.5" square.

 2.  Now, attach the back flaps to the pillow front.  I did some patchwork on one of the back flaps, but you can also solid pieces of fabric.

Press both pieces in half, right sides out.  You should now have two pieces, 16.5" x 7" and 16.5" x 13".

3.  Pin the 13" piece to the right side of the pillow front, aligning the raw edges.  If you did patchwork for the backing, make sure that your favorite part is facing the pillow front.

Pin the 7" piece to the other side of the pillow front, aligning the raw edges.  The back flaps should overlap about 3".

Detail of the back flaps overlapping.

 4.  Sew around the square with a 1/4" seam allowance.  If you'll be washing your pillow cover a lot, I'd use a triple stitch so it's more secure.  Backstitch at the beginning and end.

Flip it right-side-out, and you're done!
-Lily
Linked at some of the great blogs in my sidebar!

Monday, October 29, 2012

Happy Birthday Banner--Tutorial

For Little Man's first birthday, I made him this awesome "Happy Birthday" bunting banner.  It looked so festive hanging across the dining room above the cake at the party!  (Check out last week's post about my son's first birthday party and his rainbow cake tutorial.)  Another bonus:  this banner is made with fabric, so I can reuse it year after year. 

I looked for a tutorial online to make this bunting, but couldn't find a really good one.  Several basically said, "cut out triangle shapes and sew together".   I tried to explain a little more clearly how I made mine.
What you need:  I used quilting cottons for the pennants, letters, and ties.
  • 2/3 yd main fabric for the front of the pennants
  • 2/3 yd pennant backing fabric
  • pinking shears
  • 15 feet of bias tape (or 1/4 yd fabric)
  • scraps for letters (or 1/4 yd fabric)
  • fusible web

Let's get sewing:
1. Make your pennant template.  I used a piece of lightweight cardboard.  Mark a 7 x 10" rectangle.  Mark the center of one short end.  Use a ruler to draw two lines from the outside edges of the unmarked short end to the center marking, making a triangle shape.  Cut out on the marked lines.  (Oops, I didn't get a good pic, but this is pretty straightforward.)

2.   Lay out your backing and main fabrics wrong sides together.  Mark the pennants with a fabric pencil.  You can flip your template after each triangle so the shapes "nest" and you don't waste any fabric in between triangles. To spell out "happy birthday" you'll need 13 pennants.

3.  I pinned the triangles inside the marked lines so I wouldn't hit the pins with my pinking shears.  Then, cut through both fabrics at the same time on the marked lines.


4.  Sew along both long edges, about 1/4" from the edge.  I left the pinked edges raw.  Since these won't be washed or handled roughly, I don't think they'll fray much.

5.  Hand-cut out your letters and follow the instructions on your fusible web to adhere them to the main fabric.  I made my letters about 4" tall and 2.5" wide.  If you aren't happy with hand-drawn letters, you can also print a huge font on the computer and use that as a template.

5.  To give the letters a little pop, I zig-zag stitched around the edges with white thread.

6.  If you have bias tape, simply pin your triangles about 1" apart, with about 12" between the two words.  Your tape should cover the top 1/2" of the raw short edge.  Tuck in the two short ends of the bias tape about 1/4".  Then, topstitch about 1/8" from the edge to sew it all together.

If you don't have bias tape, check out how I made my own straight-grain version.
Now, it's time for a birthday party! 
-Lily
 
Linked up at some of the great blogs on my sidebar

Friday, September 21, 2012

Rainbow Fabric Chain--Pattern and Tutorial

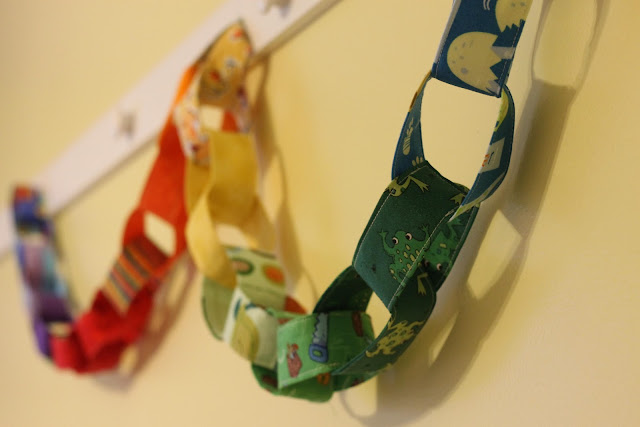
I saw a picture of a really cute paper chain a few weeks ago, where each link had a different pattern.  It got me thinking about all the fun fabrics I have in my stash, and how cute they would look in a paper chain.  So, I came up with a "fabric chain" where I used a scrap fabric from my stash for each link.  
Just for fun I put the colors in Roy G. Biv order so that it instantly transformed into a rainbow fabric chain, which makes anything cute even cuter.  It turned out great, and I plan on using it for decoration at Little Man's first birthday party!

Easy to make + re-useable = perfect decoration idea.  Plus, it's a great stash-buster.

What you need:
  • Assorted fabrics in your color scheme.  Each "link" is cut 4 x 10 inches
  • Pellon Shape-Flex SF101 interfacing.  This helps to stabilize the fabric and give it added stiffness.
Let's get sewing:

1.  Cut 4 x 10 inch links from each fabric.  I have 29 links and my chain is about 76" long, so each link added about 2.6 inches to the final garland length.

2.  Cut your Pellon interfacing into 3 x 9 inch pieces.  You'll need the same amount as you have links, so I cut 29 pieces.  Follow the directions on the Pellon to fuse the interfacing to the wrong side each link, leaving 1/2 inch all around.

3.  At this point, I laid out all my fabrics to get an idea of how I wanted to arrange them, and to see if I had enough of each color.

4.  Press in both long sides and one short side 1/2 inch.

 5.  Fold in half, wrong sides together, and pin.  I pinned all the links at the same time so that I could chain-piece them.

6.  Starting 1/2" away from the pressed short end, topstitch 1/8" from the edge along both long sides.  Backstitch at the beginning and end to secure. 
*Make sure to start 1/2 inch away from the short end*

7.  To form a link, slide the short end with raw edges into the end with pressed-under edges.  Tuck it in about 1/2" and pin.  There should be no raw edges showing.

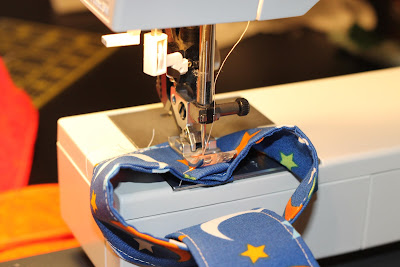
8.  Topstitch 1/8" away from where the two short ends overlap.  I removed the tray in front of my sewing machine so I had more room to maneuver.

 9.  Repeat steps 7-8 to form your chain.  Make sure to slide your link through the previous one BEFORE pinning and stitching it!  If you forget, you have two separate circles, and you have to seam-rip and re-do.  I learned this the hard way ;)

-Lily