Showing posts with label patchwork. Show all posts

Wednesday, April 3, 2013

Mistake Quilt...or, Compounding problems through sheer stubbornness

I refer to this as my "Mistake Quilt."   I didn't make a tiny, almost-invisible mistake.  I make plenty of those on all my quilts, that's part of their handmade charm.  No, for this quilt I made mistake after mistake, compounding the problems at each step.  And did I stop at any point?  No, I kept forging ahead, thinking that somehow willpower and stubbornness would fix it.

 My dear husband says it still looks nice but I suspect he's just being a super-nice husband Or maybe he just does not have my refined sense of quilt style, ha! 
Here's a partial list of the problems with this quilt:

1. Using minky fabric in piecing.  I hadn't used minky much before this project, and it was so hard to cut and piece accurately.  Plus, I forgot that I wouldn't be able to iron the seams flat.  Inside this quilt is a mess of disordered seams, yike!

2.  Not using fabrics I loved.  Some of the fabric was super-cheap clearance, and others were ones I had in my stash, and then there's the minky...looking back, I think, why, why, why??

3.  Making my own pattern.  Now, this isn't always a mistake.  I love making up my own patterns, and usually it works.  But, when trying new things, you win some, you lose some.  On top of the other problems with this quilt, this pattern wasn't a keeper.

4.  Not listening to myself.  After I put together a few blocks, I was really iffy about this quilt coming together.  I should have cut my losses and started a project I loved.

5.  Letting it sit in the closet for three years.  After finishing the top, I thought it was the ugliest quilt I'd ever made.  Rather than just donating it and forgetting all about it, I put it in my closet.  Then, every time I searched through my stash I let it gnaw at me how ugly it was and how I should really finish this project. (I hate stacks of unfinished quilts hanging around).

6.  Not basting.  I've been practicing my hand-quilting skills because I want to hand-quilt two quilts I'm making with my great grandma's quilt blocks.  Digging through the closet one day, I ran into this quilt (again) and thought it would be a great practice quilt.  I wanted to get straight to quilting, so of course I didn't have time to baste properly.  But, now I've had so many problems with the backing bunching up while I'm trying to quilt.  Note to self:  don't skip vital steps!

7.  Hand-quilting minky fabric.  That dratted minky, coming back to bite me again!  Apparently it's awful trying to hand-quilt through minky, I don't recommend it.
The good news is, I only have a few more lines of quilting to add, and then I'll be finished with this quilt!  The bad news is, what am I going to do with it??  I don't want to keep it, it's just a reminder of all the problems I've had with it.  I think I'll donate it, and a baby girl can enjoy it regardless of how many mistakes I made :)
-Lily

Linked up at some of the great blogs on my sidebar!

Monday, November 12, 2012

Simple Pillow Cover Tutorial

 When I started sewing, I wanted to make some custom pillow covers for our couch.  But, I was so intimidated by the buttons, snaps, zippers, and piping that pillow patterns always have. Then I discovered how simple pillow covers can be.  You can add all the cute extras if you want, but if you're a novice sewer like I was, you just want a simple, square pillow cover.

What I discovered was an envelope pillow cover.  The front is just a square, and the back is two flaps of fabric, so you can slide your pillow form in and out.  This style is great because it's cute, simple, and it can be removed and washed in case of a baby goo emergency.
What you need:  for a 16" pillow cover:
  • 16.5" square of fabric for the front
  • 2 pieces of backing fabric, 16.5" x 14" and 16.5" x 26"

  Let's get sewing:

1.  If you're using a simple square of fabric for the pillow front, skip this step.

I pieced and quilted a log cabin block instead of using a plain piece of fabric for my pillow front.  I made a 17" log cabin square, basted it with batting and white fabric, then I quilted a square spiral and trimmed it to 16.5" square.

 2.  Now, attach the back flaps to the pillow front.  I did some patchwork on one of the back flaps, but you can also solid pieces of fabric.

Press both pieces in half, right sides out.  You should now have two pieces, 16.5" x 7" and 16.5" x 13".

3.  Pin the 13" piece to the right side of the pillow front, aligning the raw edges.  If you did patchwork for the backing, make sure that your favorite part is facing the pillow front.

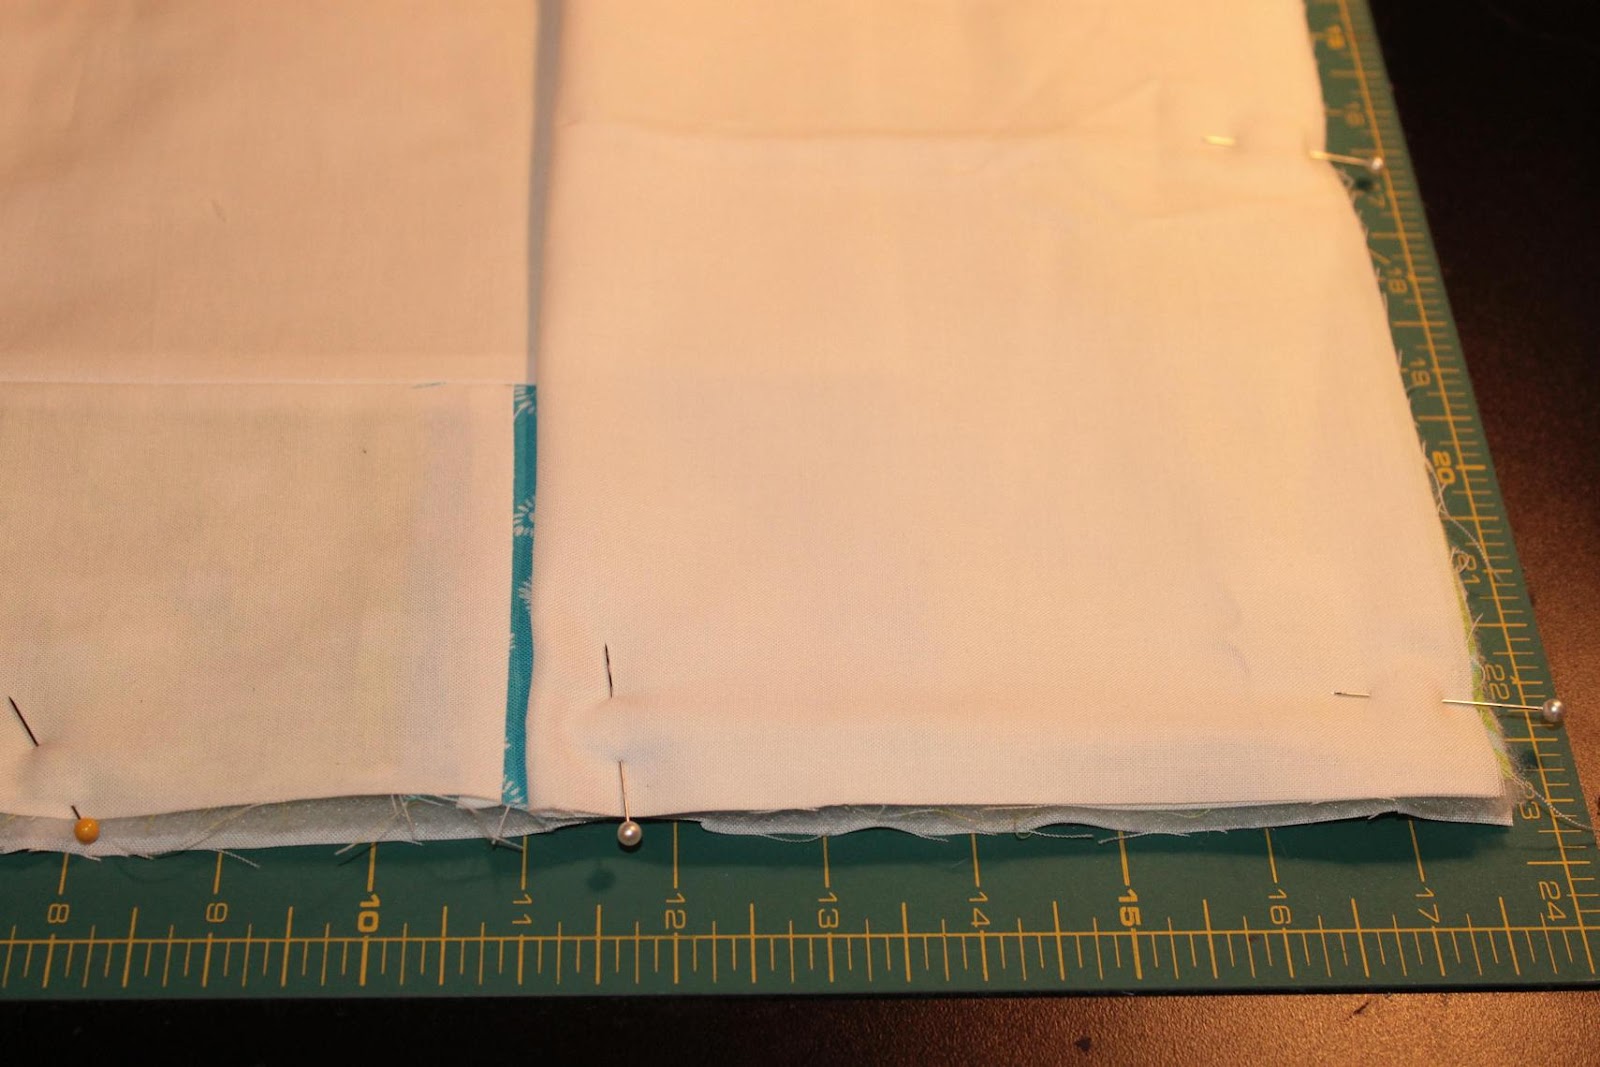
Pin the 7" piece to the other side of the pillow front, aligning the raw edges.  The back flaps should overlap about 3".

Detail of the back flaps overlapping.

 4.  Sew around the square with a 1/4" seam allowance.  If you'll be washing your pillow cover a lot, I'd use a triple stitch so it's more secure.  Backstitch at the beginning and end.

Flip it right-side-out, and you're done!
-Lily
Linked at some of the great blogs in my sidebar!

Wednesday, October 31, 2012

Half-Square Triangle Tutorial: Two at a Time

 I made this pillow for my Etsy shop and thought I'd share how I make half-square triangles two-at-a-time.  I used to cut my fabric into triangles and then sew them together into squares = terrible mess!!  All my squares were wonky (in an ugly way) and none of my points matched correctly.  Then a quilting friend taught me this easy way to make two at a time, and the finished squares look so much nicer.

The other trick is to make your half-square triangles just a little too big, then trim them down so they're all the perfect size.
Let's get sewing:
1. Start with a square that is 1 inch bigger than you want your final half-square triangles to be.  For example, I wanted 3" squares for this pillow (3.5" before piecing), so I cut 4" squares.

2.  Draw a diagonal line corner to corner on half the squares.  It usually shows up better on lighter fabrics.

3.  Match two squares, right sides together.  Sew 1/4" away along both sides of the diagonal line that you marked.  Don't sew on the diagonal line! 


 4.  Cut on the marked diagonal line.


5.  Press seams toward the darker fabric.
side note--I really need to make a new ironing board cover, this one is looking kinda ugly

6.  Use a small square ruler and your rotary cutter to square up and trim.  Align the diagonal line on the ruler with your triangle.  Here, I want my square to be 3 1/2".  I trimmed off a little on the top and side.  Then, rotate and repeat on the other two sides, and you get...

 ...perfect half-square triangles, just begging to be pieced into something beautiful!

-Lily