Showing posts with label birthday. Show all posts

Tuesday, February 4, 2014

Hulk Birthday Cake

I can't believe my oldest, Buddy, is 4 years old!  Of course, like most four-year-old boys, he loves superheroes, so this year he requested an Avengers cake.  After searching around on Pinterest, I decided that a Hulk cake would be the easiest Avenger to create in a cake design.  I know, that's not a very good reason to choose your son's birthday cake, but I justified it by telling myself that I have a 5-month-old baby, so I don't need to spend hours on a cake.

Last year, Buddy requested a Spider-man cake.  And, he's already told me that he wants a Hawkeye cake next year, and that his little brother would like an Iron Man cake for his birthday (in October).
To start I made a regular two-layer cake and coated it with bright green buttercream.  I piped on the hair and face with a writing tip using black icing.  For the teeth, I used a basketweave tip backwards, so the teeth look smooth with jagged edges.  Then I piped Hulk's eyes in green icing with a writing tip.  Super easy for how awesome it turned out!

Monday, February 11, 2013

Spider-Man Birthday Cake (Tutorial)

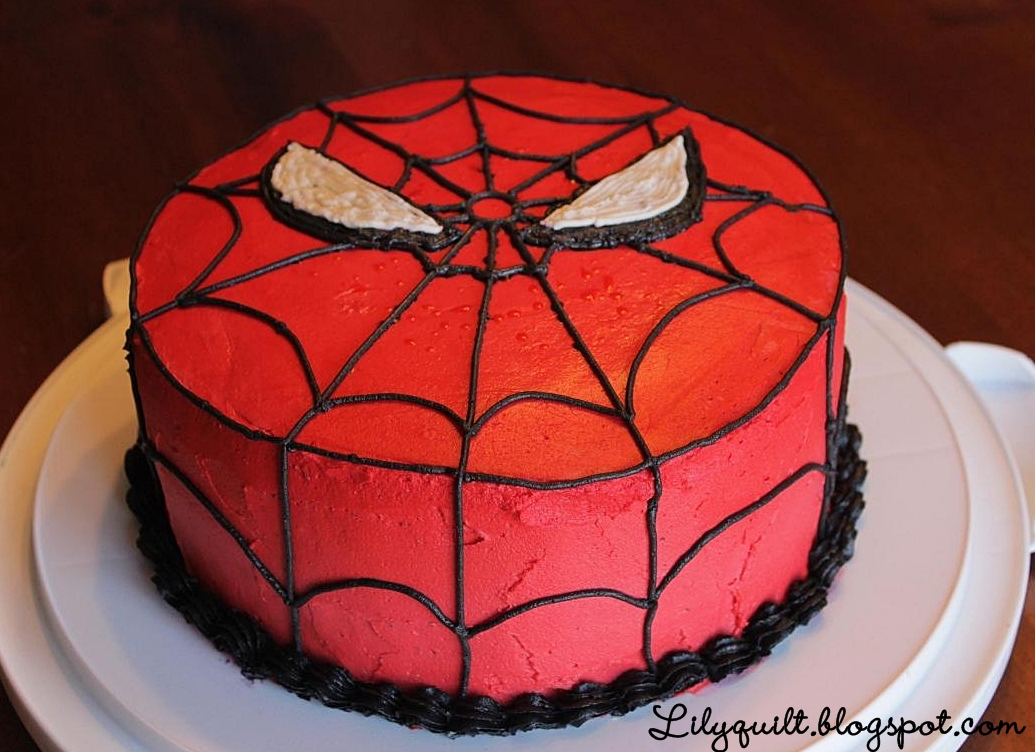
For my Buddy's 3rd birthday recently, I made him this delicious, awesome Spider-man cake!  He loved it, and it was actually a lot simpler to decorate than other cakes I've attempted.  I admit that I'm just an amateur who dabbles in cake decorating.  So, anytime I find a super-cute, super-easy cake design, that's the one for me!

My son really wanted the cakes colored.  He still talks about the rainbow cake that I made for my Little Man's birthday a few months ago!  He wanted a rainbow cake, too, but I knew that he would love this superhero cake, so I told him I'd make the cakes red and blue--Spider-man colors!

Let's get decorating:

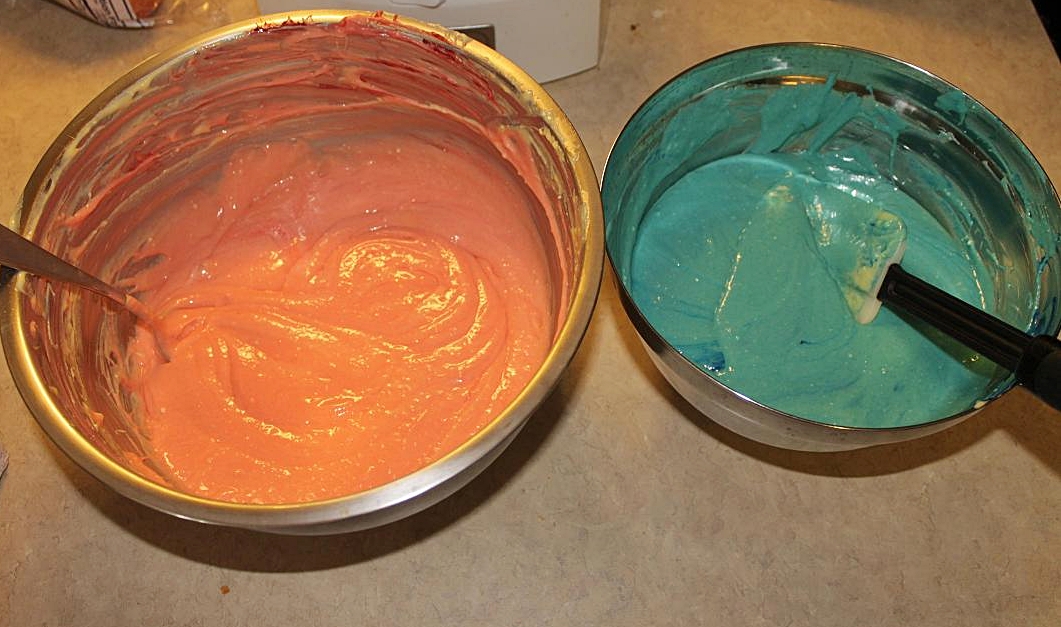
1.  First, I made two cakes mixes, one for each 9" layer.  (That way, my cakes turn out plenty thick, so that later I can level them for stacking and still have some cake left.)  Prepare the cakes mixes in separate bowls.

2.  Stir in blue food coloring gel in one bowl and red in another until you have nice colors. 

Unfortunately, I ran out of red and my top layer looked suspiciously like pink, but my son never noticed.

3.  Bake your cakes.  If you use one cake mix for each layer like I did, this will take longer than the box directions.  Just bake until a toothpick comes out clean.  After the cakes have cooled a little, remove them onto a wire rack to finish cooling.  After they're completely cool, use a cake leveller or a knife to level the tops of the cake so you can stack them.

After the first layer, put a thick layer of icing on top.  I used white because I guess I hadn't mixed my icing colors yet, but you could also use red.

4.  Use food coloring gel to make red and black icing.  (Warning:  you have to use a lot of dye to make true red and black colors that don't look pink or gray.)

Stack the second layer on top, and cover the entire cake with red icing.

5.  Load a piping bag with black icing.  Using a writing tip, draw a small circle in the middle of the cake.  I used a toothpick to lightly mark 10 lines equally spaced around the small circle.  Then pipe lines radiating out from the small circle, all the way down the sides of the cake.

6.  After you've drawn all 10 lines, connect them with arches to make it look like a spider-web.  I used two rings of arches on the top of the cake and one ring around the sides.  I also connected the lines in a ring around the top edge.

7.  Draw two large eyes with the writing tip.  I started mine just under the small circle in the center.  After drawing them and making sure I was happy that they matched, I filled them in using the writing tip.  After the icing dried, I just used my finger to smush the lines together a little bit.

8.  Fill a 2nd piping bag with white icing.  I made the top of of the eyes just like I did the black layer:  I drew it with the writing tip first, then filled it in.  After the icing dried, I smushed it a little so the lines weren't so obvious.

Finally, I piped black shells around the bottom edge. 

And that's how you impress your superhero-loving husband 3-year old!
-Lily

Linked up at some of the great blogs on my sidebar!

Monday, October 29, 2012

Happy Birthday Banner--Tutorial

For Little Man's first birthday, I made him this awesome "Happy Birthday" bunting banner.  It looked so festive hanging across the dining room above the cake at the party!  (Check out last week's post about my son's first birthday party and his rainbow cake tutorial.)  Another bonus:  this banner is made with fabric, so I can reuse it year after year. 

I looked for a tutorial online to make this bunting, but couldn't find a really good one.  Several basically said, "cut out triangle shapes and sew together".   I tried to explain a little more clearly how I made mine.
What you need:  I used quilting cottons for the pennants, letters, and ties.
  • 2/3 yd main fabric for the front of the pennants
  • 2/3 yd pennant backing fabric
  • pinking shears
  • 15 feet of bias tape (or 1/4 yd fabric)
  • scraps for letters (or 1/4 yd fabric)
  • fusible web

Let's get sewing:
1. Make your pennant template.  I used a piece of lightweight cardboard.  Mark a 7 x 10" rectangle.  Mark the center of one short end.  Use a ruler to draw two lines from the outside edges of the unmarked short end to the center marking, making a triangle shape.  Cut out on the marked lines.  (Oops, I didn't get a good pic, but this is pretty straightforward.)

2.   Lay out your backing and main fabrics wrong sides together.  Mark the pennants with a fabric pencil.  You can flip your template after each triangle so the shapes "nest" and you don't waste any fabric in between triangles. To spell out "happy birthday" you'll need 13 pennants.

3.  I pinned the triangles inside the marked lines so I wouldn't hit the pins with my pinking shears.  Then, cut through both fabrics at the same time on the marked lines.


4.  Sew along both long edges, about 1/4" from the edge.  I left the pinked edges raw.  Since these won't be washed or handled roughly, I don't think they'll fray much.

5.  Hand-cut out your letters and follow the instructions on your fusible web to adhere them to the main fabric.  I made my letters about 4" tall and 2.5" wide.  If you aren't happy with hand-drawn letters, you can also print a huge font on the computer and use that as a template.

5.  To give the letters a little pop, I zig-zag stitched around the edges with white thread.

6.  If you have bias tape, simply pin your triangles about 1" apart, with about 12" between the two words.  Your tape should cover the top 1/2" of the raw short edge.  Tuck in the two short ends of the bias tape about 1/4".  Then, topstitch about 1/8" from the edge to sew it all together.

If you don't have bias tape, check out how I made my own straight-grain version.
Now, it's time for a birthday party! 
-Lily
 
Linked up at some of the great blogs on my sidebar

Wednesday, October 17, 2012

Birthday Boy Rainbow Cake

We had a birthday party last week, and what's a 1st birthday without an awesome cake?  I saw the idea for a rainbow cake on Pinterest, and I thought it would be so fun for the birthday boy to eat smash.

To complete the fun, I also made a rainbow fabric chain and a "Happy Birthday" banner to decorate at the party.                                                                     
I obviously didn't get my rainbow layers perfect--oh, well.  It still turned out awesome!

I decided to decorate the outside very simply to let the rainbow colors inside really shine.  I used plain white frosting and added a ring of rainbow sprinkles on top.
     What you need:
  • 3 box cake mixes (white)
  • 6 mixing bowls
  • food coloring 
  • 9" round cake pans (3)
  • cake leveler
  • 3 recipes white buttercream frosting (such as Wilton's buttercream)
  • rainbow sprinkles, decorating bag and tips
Let's Get Baking:
1.  Prepare the cake mixes as directed on the box.  Divide into six separate bowls.  Use the food coloring to dye each bowl a different color.  I used concentrated gels to get bright colors. 

2.  Grease the bottom and sides of the pans.  Trace around the bottom of the pans on parchment paper and cut out three circles.  Lay one parchment paper circle in the bottom of each pan.  (This helps the cake to slide out easier after baking).  Pour in one color in the bottom, then carefully layer a 2nd color on top.  Try to evenly distribute the 2nd color, or you won't get nice layers.

For my three pans, I used:  yellow/orange; red/purple, and blue/green. 

You may not need all of the batter that you prepared, so you can use the extra to make rainbow cupcakes!

3.  Bake the cakes as directed on the box--since I used an entire cake mix in one pan, I had to bake it longer than directed.  Let it cool about 5-10 minutes in the pan.  Carefully loosen around the edge with a spatula, then let it cool completely on a wire rack.

4.  When the cake is completely cool, use a cake leveler to level the top.  Then, cut the cake into two layers.  Theoretically, it should be one purple and one red layer in the picture, but you can see that I didn't get my layers perfect.
 I cut out a parchment paper circle and laid it between the layers, put both layers back in the cake pan, and wrapped the whole pan in plastic wrap.  Then I froze the cake for a day.  This step is optional, but it really helps when decorating to start with a cold cake.  Make sure to remove the parchment paper from the bottoms before assembling.

6.  I assembled the cake starting at the bottom, with a layer of frosting between each color:
top: yellow
orange
red
purple
blue
bottom: green

6. I used plain white frosting to ice the outside.  Then I used white icing to pipe a shell border on the bottom.  Then I carefully added a ring of rainbow sprinkles on top.
Cutting the cake--yay, success!  Enjoy your rainbow birthday cake :)
-Lily