Showing posts with label toy. Show all posts

Friday, February 1, 2013

Quilted Words for a Flannel Board (Tutorial)

I made these quilted words as a custom order on Etsy several months ago, and this tutorial has been sitting around way too long on my computer.  It's such a cute idea, and I definitely plan to make a set for my boys when they're a little older.  I love, love, love these quilted words, and as a bonus they'll be so fun for young readers.

I don't actually have a giant flannel board, but I may have to make one just for this.  If you don't have a giant flannel board either, maybe you could buy a large flannel blanket and play on that.  Or, you could just lay the words out on the floor.
 Part of the fun is the whimsical shapes and bright, bold fabrics!  If you're feeling adventurous, you could even try triangles, circles, or hexagons rather than sticking to boring old rectangles :)  I think another fun option would be to make an entire alphabet set, so little ones can learn to spell out words.


 What you need:
  • Assorted cotton prints
  • Batting
  • Felt for backing
  • Velcro (optional)
  • Fusible web
  • All-purpose thread


Let's get sewing
1.  Cut your cotton prints, felt, and batting into shapes for your words/letters.  I made mine into rectangles about 11 x 5 inches and 13 x 7 inches for the long words.  Any smaller and I couldn't fit a whole word on them.  If you're making short words or individual letters, you can cut them smaller.  (I cut my squares about 7-8".)  These measurements include 1" on each side for a 1/2" seam allowance. 

2.  If you are making words for a flannel board, I suggest sewing one or two 2" pieces of the "hook" side of hook-and-loop tape (velcro) to your felt backing, which will help it stick to the flannel.  Sew the velcro about 1" down from the top of the felt and 1-2" from the sides.

3.  Draw the letters for your words.  If you look at the pictures, you can see I made some "rounded" letters, but if I did this project again I'd use all straight-edged letters like in the pic below.  The round letters were much more difficult to zig-zag stitch in step 8. 

I free-handed my letters, but you could also print off letters in a huge font on your computer, then trace them on the fusible web. (Make sure to trace the reverse of the letters--see my "F" below).  Peel off the paper backing and stick them on the wrong side of your fabric.

4.  Cut out the letters, peel off the paper, and arrange them in the center of the rectangle.  I tried to leave space at the top so my letters wouldn't overlap the velcro when I assembled the words.  You'll be sewing the letters down in step 8, and it's annoying to sew over velcro.  Follow the directions on your fusible web to fuse the letters to the fabric.

5.  Make an "inside-out" quilt sandwich:  cotton with letters facing up, felt right-side down (with velcro against the letters), and batting on top.

6.  Sew around the rectangle with a 1/2" seam allowance.  Leave a 3" opening in the bottom for turning.  Clip the extra fabric at the corners so it will lay flat after turning.

7.  Turn out, then topstitch 1/4" from the edge to sew the opening shut and to help the word lay flat.

8.  Using a zig-zag stitch, sew around the edges of all the letters.  This secures the letters, and it also functions as quilting.

9.  If you want, you can also add some cute decorative quilting with a straight stitch.
Repeat steps 1-9 to make a bunch of cute words that your kids will love to play with again and again!
-Lily


Linked up at some of the great blogs on my sidebar!

Friday, September 28, 2012

Fabric Chain for Kids--Pattern and Tutorial

After making my fabric chain decoration last week, I got to thinking how fun it would be for my two-year old to make one.  So, I made this fabric chain with velcro closures that he could play with.

It's a hit!  He loved playing with the velcro, and he loved finding all the different ways to attach the circles together.

Here we go--you're only three steps away from having this fun toy!

What you need:
  • Fabric scraps, cut to 4 x 10"
  • Fusible fleece, cut to 1.5 x 9" strips.
  • Velcro, cut to 1" pieces.
  • Thread to match
Let's get sewing:

1.  Fuse the fleece strips to the wrong side of your fabric rectangles,  1/2" from one long edge, with 1/2" on either side.


    2.  Press in 1/2" on all four sides.  Then fold in half and pin.
Press in 1/2"
Pinned and ready to sew closed
3.  Topstitch around all four sides of your rectangle, about 1/8" away from the edges. Then sew on your velcro--one piece on the front and one on the back.  This is important, otherwise you can't connect the links in your chain without twisting them.
Topstitch around all four sides

Sew velcro--one to the front and one to the back.
That's it!  Keep repeating the steps and to your chain as you want (or in my case, I stopped with 9 links when I ran out of velcro.  It seems like a good amount).

Time to go play with my kids! 
-Lily

Monday, September 17, 2012

15 T-shirt Tutorials

I made this custom T-shirt Quilt a few years ago.  I should get around to making a tutorial, but for now, I'll just list other people's projects


I must have dozens of X-Large shirts sitting in the back of the closet.  It seems like we get them free everywhere but nobody in our house wears them.  Not even when I was nine months pregnant did I need an XL shirt, but for some reason that's the only size they give away at blood drives, picnics, and every group gathering.  So, after making my T-shirt Ruffle Skirt, I thought it would be fun to look at other projects that I could make with all those T-shirts sitting around.

I know that there are lots of pictures floating around the internet, but many have no patterns or tutorials to go with them.  So, I rounded up my favorite 15 t-shirt tutorials:

1.  Braided Rag Rug

2.  Random Ruffles Skirt

3.  T-shirt Yarn

4.  Plushie Robot Doll

5.  Tote Bag

6.  T-shirt Quilt

7.  Braided T-shirt Bracelets

8.  Little Girl Sundress

9.   T-shirt Dress

10.  Infinity Scarf

11.  Shag Rag Rug

12.  T-shirt Bag

13.  T-shirt Diaper

14.  Braided Scarf

15.  Baby Bib
 
 
And a bonus tutorial:  Messenger Bag from Cargo Pants!  This looked so cool I had to pass it along.  I'm not sure I have extra cargo pants sitting around.  Maybe I could borrow some of my husband's and he wouldn't notice...
 -Lily

Wednesday, September 5, 2012

Rainbow Ribbon Wand Tutorial

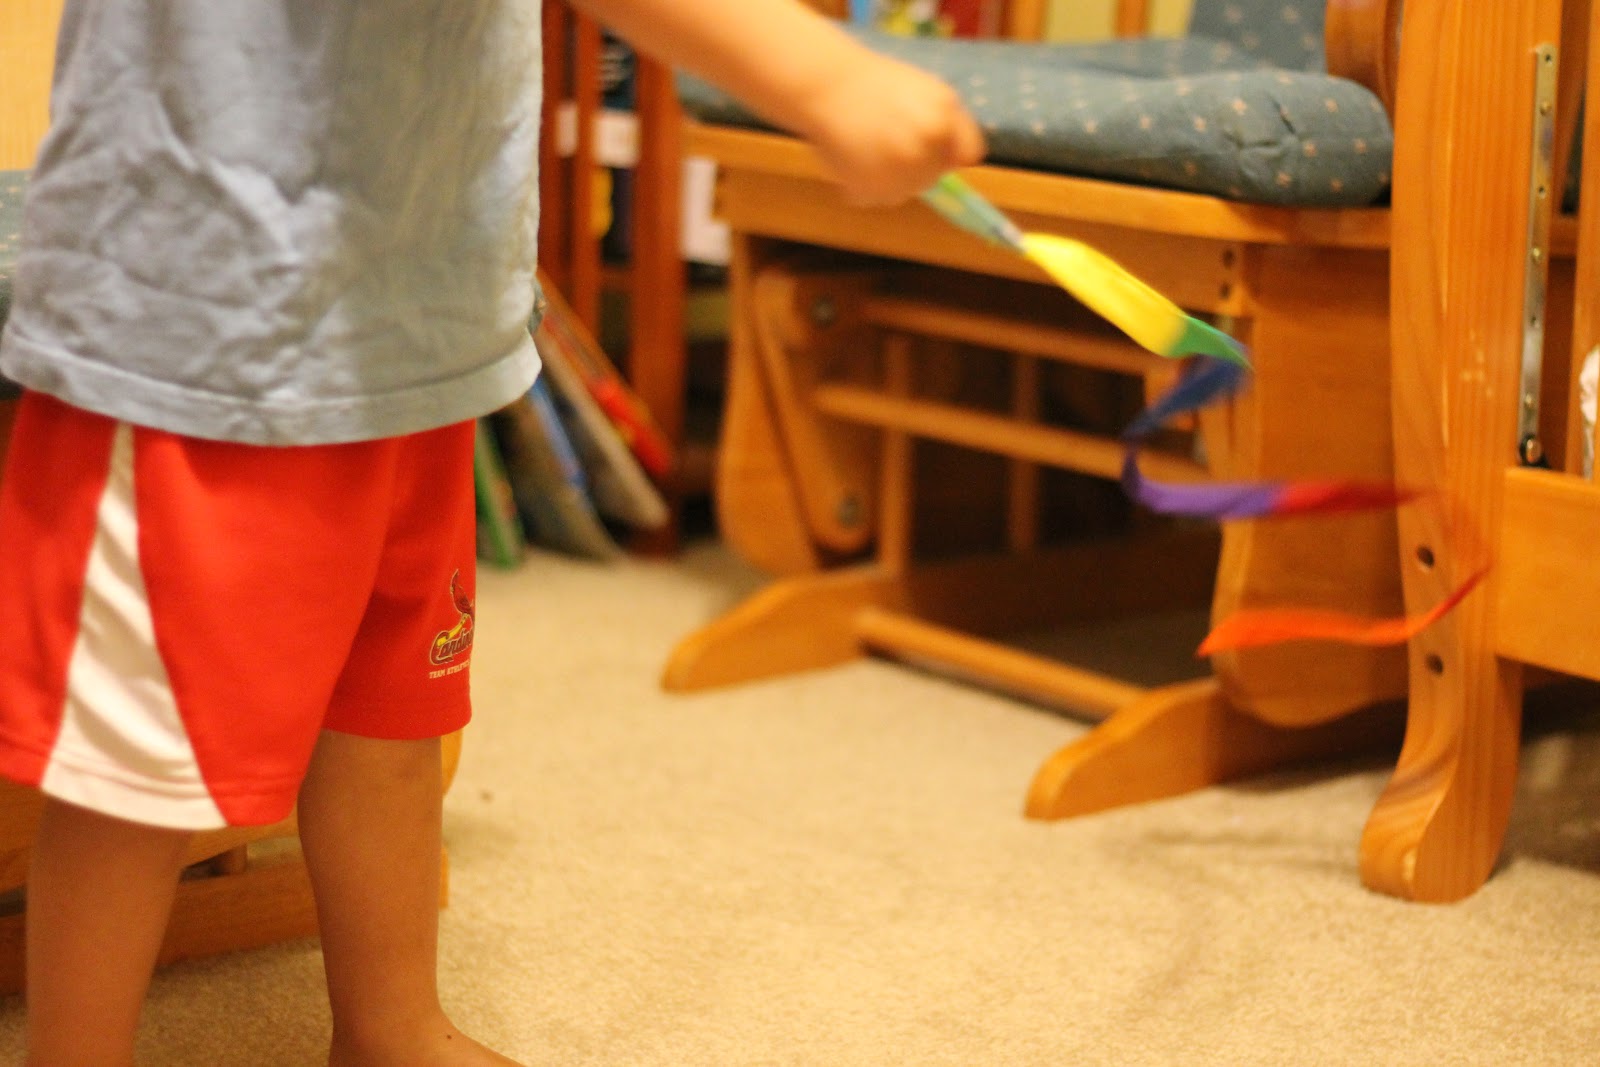
My two-year-old loved watching gymnastics on the Olympics.  He's still talking about it and trying to imitate all the balancing, jumping, and twirling.  So, I thought it would be fun to make him a ribbon wand like we saw in the rhythmic gymnastics competition.  I made it with bright rainbow colors because he's also learning his color and loves to name them all.  And, it's just so cute!
What you need:
  • Red, Orange, Yellow, Green, Blue, and Purple fabrics.  Cut 1 piece 2 1/2" by 6 1/2" from each fabric.
  • Polka dot or other fun print for handle.  Cut 1 piece 5" square.
  • Peltex sew-in ultra firm stabilizer.  Cut 2 pieces 1 1/4" by 3 1/2"

Let's get sewing:
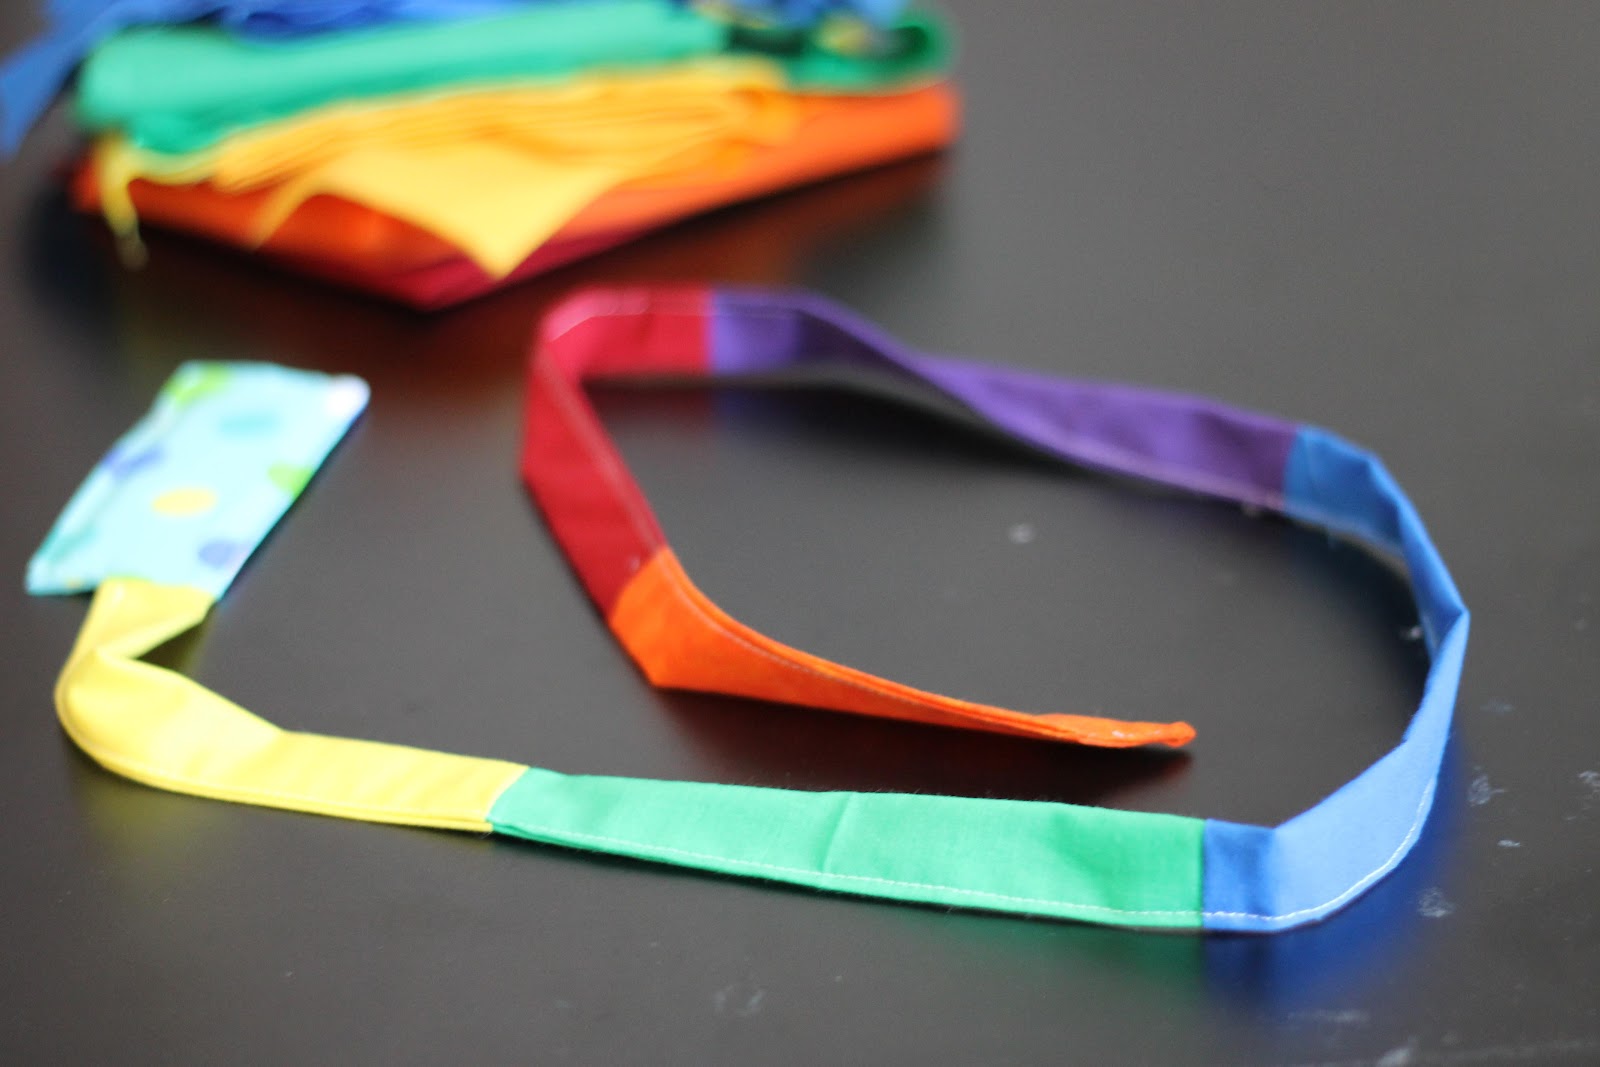
1. Line up your fabrics until you're happy with color placement.  I chose:  handle-yellow-green-blue-purple-red-orange.

2.  Using a 1/4" seam allowance, sew the short ends of the 6 rectangles together, right sides together.  Do not sew to the handle square yet!

3.  On the rectangle next to the handle, mark dots 3/8" from the edges on one short side.  Center on the handle square, right sides together. Sew between the dots with a 1/4" seam allowance.

4.  To create a tip at the end, fold the last rectangle in half right sides together and sew along the short end.  Then turn it right-side-out, fold down the seam, and press the tip into a triangle.

5.  Press in the long edges of the ribbon 3/8".  Press in the handle edges 1/2".  (There's a seam in the middle of my handle because I cut it incorrectly--you hopefully won't have that)

6.  Now, fold the ribbon in half lengthwise and pin.  Topstich 1/8" away from the edge along the tip and long side to close.  Sew along the top and both long sides of the handle, leaving the bottom open.

7.  Slip both pieces of stabilizer inside the handle.  Topstich to close the bottom.


Finished!

-Lily


Monday, September 3, 2012

Indoor Frisbee Tutorial

A few weeks ago, my two-year old discovered a loophole in the "don't throw things" rule:  he learned the word "frisbee."  He loves to find disc-shaped objects and throw them all around the house.  Upside:  it's really cute and keeps him entertained for a long time.  Downside:  it's ruining our walls.  And our cabinets.  And our furniture.  And probably other things I haven't noticed.  So, I decided to invent an indoor frisbee that would be just as fun but not so destructive. 

What you need: (for one frisbee)
  • 2 fleece circles approximately 7 inches in diameter.  I used a handy plastic lid as my template.
  • 1 circle of Peltex sew-in ultra firm stabilizer, 1 inch smaller in diameter than fleece.
  • Optional:  Six or more 4 inch lengths of ribbon
Let's get sewing:

1. Cut edges of fleece circles every 3/4 inches, about 3/8 inch cuts.  This gives the frisbee a rag-quilt look.

2. Place fleece right-side down, with stabilizer on top.  There should be about 1/2 inch of fleece showing all around.

3.  Place 2nd fleece circle right-side up on top of stabilizer and pin in place.  If you are using ribbons, knot or burn the ends so they don't fray.  Pin in place around the frisbee, making sure that the ends are about 1" in from the outer edge and will be secured when you sew around.

4.  Sew around the frisbee with a 1/2 inch seam allowance.  I like to backstich over the ribbons to make sure they're secure.

5.  If you want, add some extra topstiching so they look super-cute.  I added a spiral to one and a square-within-a-square to the other.
-Lily