Sunday, September 30, 2012

Homemade Restaurant Fajitas


I know, "homemade restaurant fajitas" is an oxymoron.  But, these fajitas are so good, they taste like you're at a restaurant!  Fajitas used to me my go-to dish when I went out.  I always ordered it, and sometimes Dan and I shared.

But no more.

Now, we never order fajitas.  I tried to a few times after making these, but I was always disappointed.  They were never as good as mine.  (Ok, maybe they were equal to mine.  But for 4 times the cost as making them at home, they'd better be amazing.)
What you need for 8 servings:
  • 1 large onion, sliced into rings
  • 1 red bell pepper, sliced
  • 1 green bell pepper, sliced
  • 1 lb boneless, skinless chicken breast
  • 2 Tbs oil, divided
  • Chicken marinade (see below)  
  • 6" tortillas
  • optional toppings such as avocado, sour cream, cheese, lettuce
Chicken marinade:
  • 1/3 cup water
  • 2 Tbs oil
  • 1 clove garlic, minced
  • 1 Tbs vinegar
  • 2 tsp soy sauce
  • 1/2 tsp liquid smoke
  • 1/2 tsp salt
  • 1/4 tsp black pepper
  • 1/2 tsp chili powder (optional)
  • 1/2 tsp cayenne pepper (optional)  Omit these if you don't like spicy fajitas.

Let's get cooking:

1. Cut chicken into strips, about 1/2" by 3".  Combine all marinade ingredients and add chicken.  Let marinade about 2 hours in the fridge. 

2.  Heat 1 Tbs oil in skillet over medium-high heat (or use a cast-iron griddle like in the pic).  Saute onions and peppers until softening.
Mmm, you can almost hear these sizzling!


3.  Remove veggies from skillet.  Heat 1 Tbs oil over medium-high heat, and cook marinated chicken.

4.  Serve on warm tortillas with any toppings you like.  We like lettuce, avocado, and homemade refried beans.

-Lily


Friday, September 28, 2012

Fabric Chain for Kids--Pattern and Tutorial

After making my fabric chain decoration last week, I got to thinking how fun it would be for my two-year old to make one.  So, I made this fabric chain with velcro closures that he could play with.

It's a hit!  He loved playing with the velcro, and he loved finding all the different ways to attach the circles together.

Here we go--you're only three steps away from having this fun toy!

What you need:
  • Fabric scraps, cut to 4 x 10"
  • Fusible fleece, cut to 1.5 x 9" strips.
  • Velcro, cut to 1" pieces.
  • Thread to match
Let's get sewing:

1.  Fuse the fleece strips to the wrong side of your fabric rectangles,  1/2" from one long edge, with 1/2" on either side.


    2.  Press in 1/2" on all four sides.  Then fold in half and pin.
Press in 1/2"
Pinned and ready to sew closed
3.  Topstitch around all four sides of your rectangle, about 1/8" away from the edges. Then sew on your velcro--one piece on the front and one on the back.  This is important, otherwise you can't connect the links in your chain without twisting them.
Topstitch around all four sides

Sew velcro--one to the front and one to the back.
That's it!  Keep repeating the steps and to your chain as you want (or in my case, I stopped with 9 links when I ran out of velcro.  It seems like a good amount).

Time to go play with my kids! 
-Lily

Wednesday, September 26, 2012

Crib Rail Teething Bumpers--Pattern and Tutorial

My almost-one-year-old has taken to standing in his crib and gnawing on the crib rails all the time.  It's really gross and I'm always agonizing about him getting lead poisoning or some other horrible disease from trace toxins in the varnish.  Not to mention, it was ruining our really nice wooden crib.  Then I saw this awesome idea online:  cover the rails with bumpers!  This is one of those "why didn't I think of that??" projects.  I couldn't find a good tutorial, so I came up with a pattern.

I wanted to share these with other moms who are also imagining all the terrible things that can happen when their babies eat the crib.
Protecting your baby from all kinds of dangers, real or imagined ;)

What you need:
  •   1 and 3/4 yd 40" fabric for the bumpers.  I used a cotton flannel, but quilting cotton would also work.
  • 1/2 yd fabric for the fabric ties.  I used the same fabric as the bumpers, but a coordinating fabric would also look cute.
  • thread to match, I used Gutermann 100% cotton.
  • polyester batting 
-With this fabric, you'll have enough to make two bumpers that measure 28 x 9 inches and one that measures 51 x 9 inches, which should fit a standard crib.
-Use a 1/2" seam allowance

 Let's get sewing:
1.  Trim selvedges off bumper fabric.  Cut six 10" strips.

Cutting guide:   (Sorry it's so ugly, I drew it in Paint.  Don't judge my non-tech skills!)

2. To make the short bumpers, cut three 10" strips in Step 1, into 29" and 11" pieces.  Sew two 11" pieces right sides together on a 10" edge.  Repeat with the third piece.  Trim so the final piece measures 10 x 29".  You should now have four 10 x 29" rectangles.

3.  To make the long bumper, take a 10" strip from Step 1 and cut two 13" rectangles.  Sew each one to a 10 x 40" strip from Step 1, right sides together.  You should have two 10 x 51" rectangles.  Press open all seam allowances.
4.  Now, cut the fabric ties.  Trim off the selvedge, then cut seven 1 3/4" strips across the width of your tie fabric.  Cut each strip into 3 ties about 13" long.  You'll need 20 ties.

5. To make the ties, press under 1/4" on both long sides and one short side, then press in half. 

6.  Topstitch closed, about 1/8" from the edge.

7.  To make the first short bumper, lay out one 10 x 29" panel, right side up.  Pin one tie at each corner, 1" from the long edge.  Pin one tie in the middle of each long side.  Refer to picture:


It should look like this:
8. You're going to make an "inside-out" quilt sandwich.  Lay a second 10 x 29" panel right-side down on top of the pinned ties.

9.  Cut one 10 x 51" piece of batting and two 10 x 29" pieces of batting.  Lay one short piece on top and pin all three layers together.

10.  Sew around the edge, leaving 6" open for turning.  Turn out, pin under the opening, and topstitch 1/4" from the edge all around the bumper.  

11. I quilted these very simply with a rectangle 2" from the edge, then a second rectangle 4" from the edge. 

12.   Repeat steps 5-9 for the second short bumper.

13. For the long bumper, I laid out the strips as shown in Step 5, except I had two on each long side, 17" apart.  Then I repeated steps 6-9. After quilting, I hand-cut an elephant applique and used fusible web to attach it.


Ta-da!  Now your baby can chew all night and not damage himself or the crib!
-Lily


Monday, September 24, 2012

How to Make Homemade Breadcrumbs

I discovered that I could make homemade bread crumbs a couple years ago, and I've never looked back.  They're so easy, and cheap, and taste so much better than the crumbled cardboard that you buy in the store.  Yummy!

For about 3/4 cup crumbs, all you need is two slices of bread.

Yep, that's it.  I usually keep bread heels, ends, stale homemade bread, etc. in a ziploc or bread bag in the freezer, then I just pull out what I need.


Toast bread for 1-2 cycles.

You want it golden and dry, but not burnt.

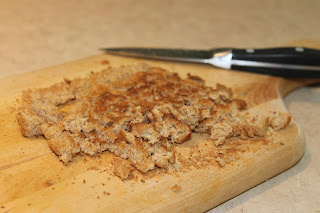
Cut into fine crumbs
 And, now you have homemade bread crumbs!
Substitution note: usually recipes call for store-bought breadcrumbs, so if you substitute homemade you may need to experiment a little with the amount you use.  You may need a different quantity to get the same taste or texture.

-Lily

Friday, September 21, 2012

Rainbow Fabric Chain--Pattern and Tutorial

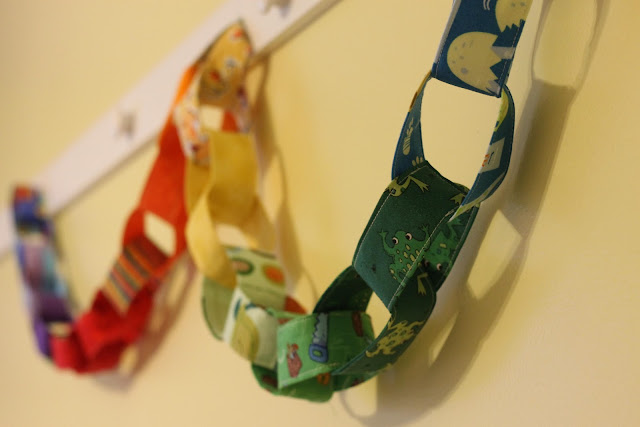
I saw a picture of a really cute paper chain a few weeks ago, where each link had a different pattern.  It got me thinking about all the fun fabrics I have in my stash, and how cute they would look in a paper chain.  So, I came up with a "fabric chain" where I used a scrap fabric from my stash for each link.  
Just for fun I put the colors in Roy G. Biv order so that it instantly transformed into a rainbow fabric chain, which makes anything cute even cuter.  It turned out great, and I plan on using it for decoration at Little Man's first birthday party!

Easy to make + re-useable = perfect decoration idea.  Plus, it's a great stash-buster.

What you need:
  • Assorted fabrics in your color scheme.  Each "link" is cut 4 x 10 inches
  • Pellon Shape-Flex SF101 interfacing.  This helps to stabilize the fabric and give it added stiffness.
Let's get sewing:

1.  Cut 4 x 10 inch links from each fabric.  I have 29 links and my chain is about 76" long, so each link added about 2.6 inches to the final garland length.

2.  Cut your Pellon interfacing into 3 x 9 inch pieces.  You'll need the same amount as you have links, so I cut 29 pieces.  Follow the directions on the Pellon to fuse the interfacing to the wrong side each link, leaving 1/2 inch all around.

3.  At this point, I laid out all my fabrics to get an idea of how I wanted to arrange them, and to see if I had enough of each color.

4.  Press in both long sides and one short side 1/2 inch.

 5.  Fold in half, wrong sides together, and pin.  I pinned all the links at the same time so that I could chain-piece them.

6.  Starting 1/2" away from the pressed short end, topstitch 1/8" from the edge along both long sides.  Backstitch at the beginning and end to secure. 
*Make sure to start 1/2 inch away from the short end*

7.  To form a link, slide the short end with raw edges into the end with pressed-under edges.  Tuck it in about 1/2" and pin.  There should be no raw edges showing.

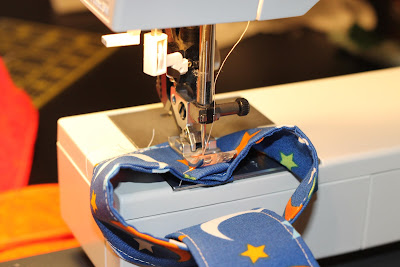
8.  Topstitch 1/8" away from where the two short ends overlap.  I removed the tray in front of my sewing machine so I had more room to maneuver.

 9.  Repeat steps 7-8 to form your chain.  Make sure to slide your link through the previous one BEFORE pinning and stitching it!  If you forget, you have two separate circles, and you have to seam-rip and re-do.  I learned this the hard way ;)

-Lily

Wednesday, September 19, 2012

Homemade Chocolate Frosty


My husband found this recipe to make a Wendy's chocolate frosty at home--yummy!  I got a Cuisinart ice cream maker for my birthday and we've been on the lookout for great recipes to make with it.  This frosty recipe is delicious--it tastes just like going to Wendy's!
 I tried to restrain myself and just have this little cup.  But, I went back for seconds...

What you need:  For 6 servings (or 4 large servings if you eat waaaay too much ice cream, like me)
  • 3 3/4 cups whole milk  (I tried using an even 4 cups, and it overflows my Cuisinart)
  • 1/2 can sweetened condensed milk--eyeball it
  • heaping 1/3 cup Homemade Chocolate Syrup (about 6 Tbs)

Lets get cooking:
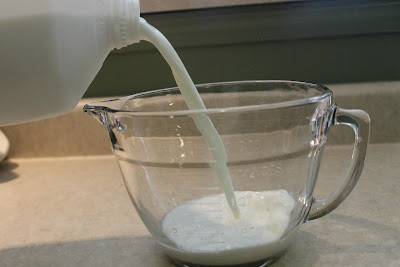
Pour in milk.


Add sweetened condensed milk.

Add chocolate syrup.

Whisk together.  Let it chill in the fridge for a couple hours.

Pour into your ice cream maker and wait 25 minutes.

It's ready!  I forgot my own advice and used 4 cups of milk = overflow!

This tastes best when eaten right away, or within a few hours.  But, it will save several weeks in the freezer in an airtight container.  (I don't actually know that from personal experience, since I always eat it all within a day or two). 

-Lily