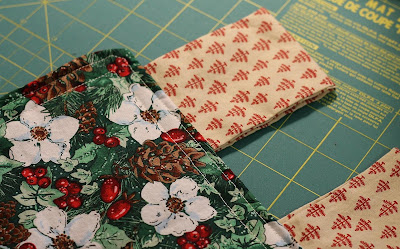
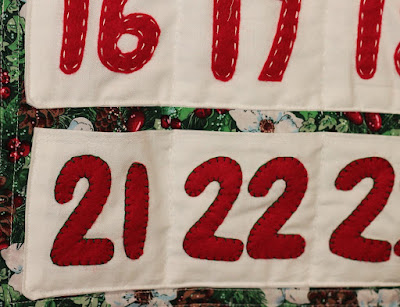
Sometimes, projects can sit around waaaay too long. For example, I started this advent calendar last November...and I just finished it. But, it's the end result that matters, right? And it did turn out really cute, so I'm glad I didn't try to rush it. Don't be alarmed, it's a pretty simple project. About 98% of the time I took to finish it was spent procrastinating.
Now all I have to do is make a felt marker to move from pocket to pocket. Hopefully that doesn't take me until next Christmas! (Update: Check out the tutorial for the felt star and baby Jesus markers I made)
What you need:
- 1 main fabric, 24 x 22 inches
- 1 backing fabric, 24 x 22 inches
- 1 piece of batting, 24 x 22 inches
- 4 pieces of fabric 8 x 8 inches, for the tabs. I don't recommend a directional fabric, or you might have upside-down trees like me, oops.
- 5 pieces of white fabric, 9 x 20 inches, for the pockets
- Red felt
- White and green embroidery floss
Let's get sewing: I used all-purpose white thread and a 1/2" seam allowance.
1. First, make the pockets. I decided it was a lot easier to make 5 long pockets and divide them with quilting lines, rather than sew on 25 separate pockets. Fold your rectangles in half, right sides together, so that you have 4.5 x 20" rectangles. Sew around the 3 open edges, leaving a 3" opening for turning. Clip your corners (see pic) so they'll lay flat when turned out.
Turn out the pockets, press, and topstitch 1/8" and 1/4" away from the folded edge.2. Next, make the tabs. Fold the squares in half, right sides together. Sew along the open long side of the rectangle formed. Turn out and press.
3. Place your backing and main fabrics right sides together, and place the batting on top. Pin the the tabs along a short end. Place between the main and backing fabrics, aligning the raw edges. Place the two outer tabs 1" from the edge and leave about 2.5" between tabs.
Sew around all four edges, leaving a 5" opening in the bottom for turning. Turn out, then topstitch 1/4" and 1/2" away from the edge.
Your calendar should now look like this:
4. Cut out 40 1.5 x 2.5" rectangles from red felt, then cut out all the numbers by hand. (I started with rectangles because it helped me keep the numbers a consistent size.)
5. Lightly mark the pockets about every 3 3/4"--that's where the dividing lines for the pockets will be. Use these lines to help center your numbers.
I couldn't decide whether to use white or green thread, a running or blanket stitch, so I used all of them to attach my numbers. You can use your preferred hand stitch, or even attach the numbers by machine. I used 2 strands of embroidery floss.
6. Now attach your pockets to the calendar. Note that in my pic, I don't have the numbers attached. I added them after sewing the pockets to the calendar, which I think was a bad idea. It was really hard to get my needle in and out behind the pocket without sewing through the main fabric. If I did this again, I would attach the numbers first, then attach the pockets second.
Pin your pockets on the calendar and topstitch along three edges to attach, leaving the top of each pocket open.
7. Using your marks as a guide, topstitch about every 3 3/4" to form pockets. I did this with hand-quilting, but you could also use a machine.
Have fun counting down and preparing for Christmas!
-Lily


No comments:
Post a Comment
Join the conversation--your comments make me happy!