Wednesday, October 31, 2012

Half-Square Triangle Tutorial: Two at a Time

 I made this pillow for my Etsy shop and thought I'd share how I make half-square triangles two-at-a-time.  I used to cut my fabric into triangles and then sew them together into squares = terrible mess!!  All my squares were wonky (in an ugly way) and none of my points matched correctly.  Then a quilting friend taught me this easy way to make two at a time, and the finished squares look so much nicer.

The other trick is to make your half-square triangles just a little too big, then trim them down so they're all the perfect size.
Let's get sewing:
1. Start with a square that is 1 inch bigger than you want your final half-square triangles to be.  For example, I wanted 3" squares for this pillow (3.5" before piecing), so I cut 4" squares.

2.  Draw a diagonal line corner to corner on half the squares.  It usually shows up better on lighter fabrics.

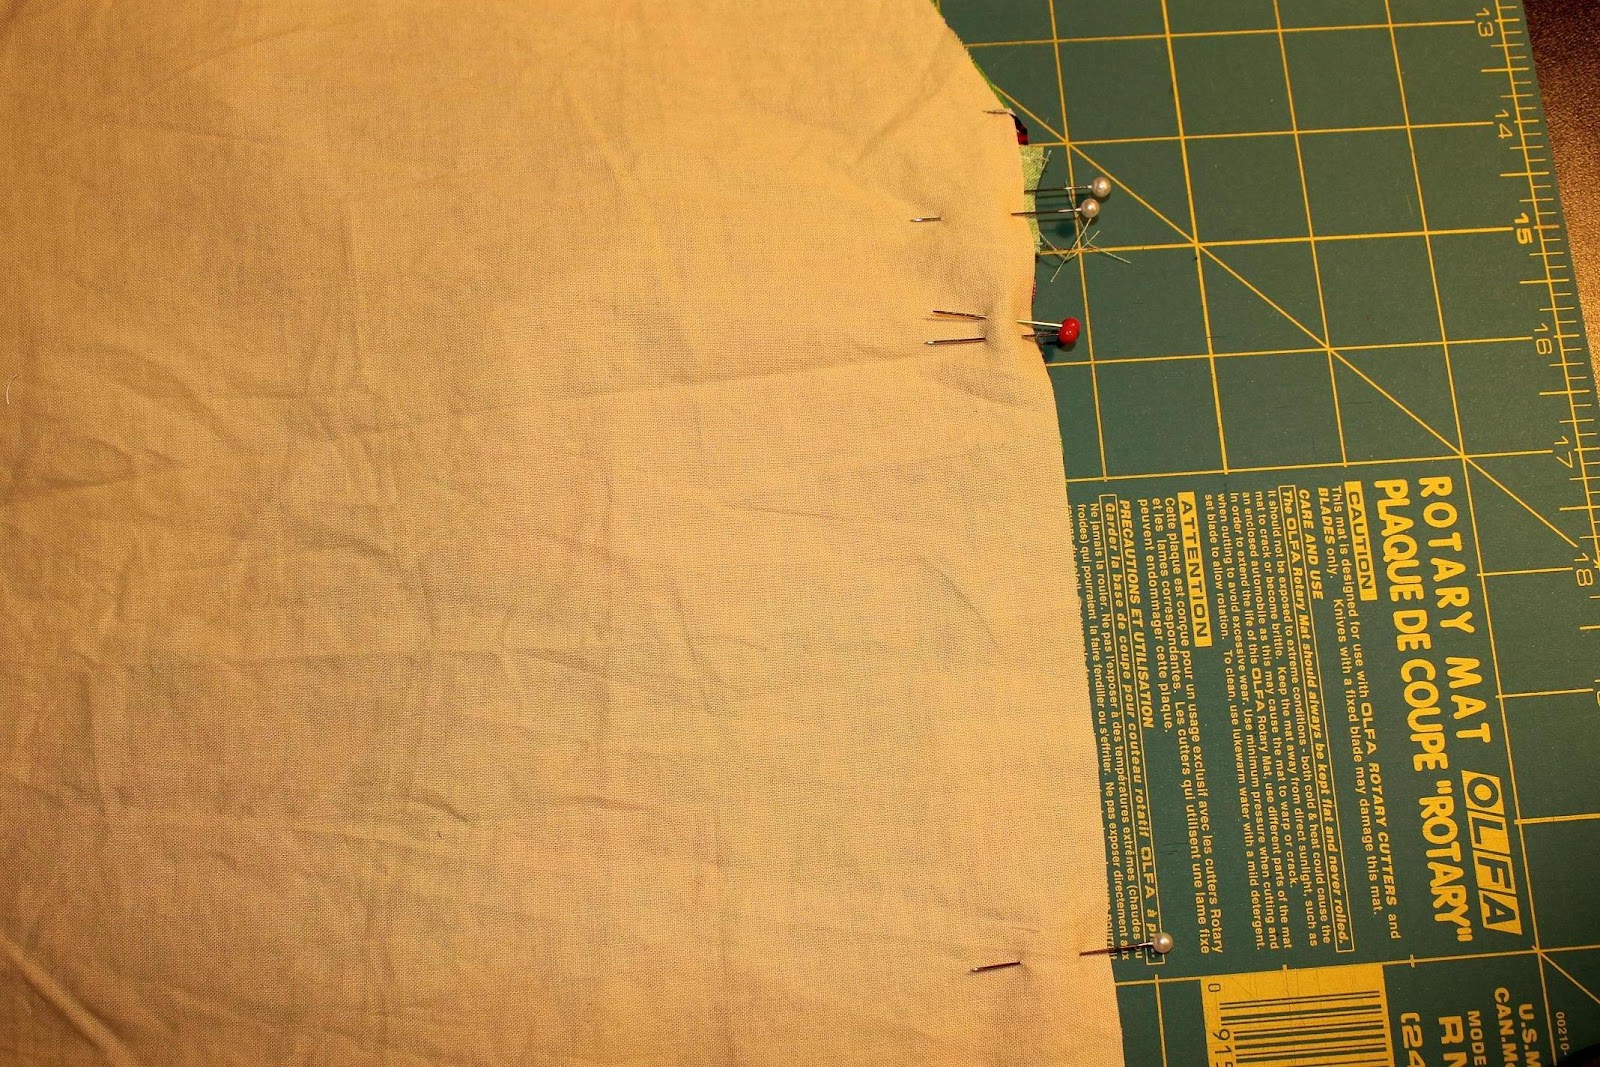
3.  Match two squares, right sides together.  Sew 1/4" away along both sides of the diagonal line that you marked.  Don't sew on the diagonal line! 


 4.  Cut on the marked diagonal line.


5.  Press seams toward the darker fabric.
side note--I really need to make a new ironing board cover, this one is looking kinda ugly

6.  Use a small square ruler and your rotary cutter to square up and trim.  Align the diagonal line on the ruler with your triangle.  Here, I want my square to be 3 1/2".  I trimmed off a little on the top and side.  Then, rotate and repeat on the other two sides, and you get...

 ...perfect half-square triangles, just begging to be pieced into something beautiful!

-Lily


Monday, October 29, 2012

Happy Birthday Banner--Tutorial

For Little Man's first birthday, I made him this awesome "Happy Birthday" bunting banner.  It looked so festive hanging across the dining room above the cake at the party!  (Check out last week's post about my son's first birthday party and his rainbow cake tutorial.)  Another bonus:  this banner is made with fabric, so I can reuse it year after year. 

I looked for a tutorial online to make this bunting, but couldn't find a really good one.  Several basically said, "cut out triangle shapes and sew together".   I tried to explain a little more clearly how I made mine.
What you need:  I used quilting cottons for the pennants, letters, and ties.
  • 2/3 yd main fabric for the front of the pennants
  • 2/3 yd pennant backing fabric
  • pinking shears
  • 15 feet of bias tape (or 1/4 yd fabric)
  • scraps for letters (or 1/4 yd fabric)
  • fusible web

Let's get sewing:
1. Make your pennant template.  I used a piece of lightweight cardboard.  Mark a 7 x 10" rectangle.  Mark the center of one short end.  Use a ruler to draw two lines from the outside edges of the unmarked short end to the center marking, making a triangle shape.  Cut out on the marked lines.  (Oops, I didn't get a good pic, but this is pretty straightforward.)

2.   Lay out your backing and main fabrics wrong sides together.  Mark the pennants with a fabric pencil.  You can flip your template after each triangle so the shapes "nest" and you don't waste any fabric in between triangles. To spell out "happy birthday" you'll need 13 pennants.

3.  I pinned the triangles inside the marked lines so I wouldn't hit the pins with my pinking shears.  Then, cut through both fabrics at the same time on the marked lines.


4.  Sew along both long edges, about 1/4" from the edge.  I left the pinked edges raw.  Since these won't be washed or handled roughly, I don't think they'll fray much.

5.  Hand-cut out your letters and follow the instructions on your fusible web to adhere them to the main fabric.  I made my letters about 4" tall and 2.5" wide.  If you aren't happy with hand-drawn letters, you can also print a huge font on the computer and use that as a template.

5.  To give the letters a little pop, I zig-zag stitched around the edges with white thread.

6.  If you have bias tape, simply pin your triangles about 1" apart, with about 12" between the two words.  Your tape should cover the top 1/2" of the raw short edge.  Tuck in the two short ends of the bias tape about 1/4".  Then, topstitch about 1/8" from the edge to sew it all together.

If you don't have bias tape, check out how I made my own straight-grain version.
Now, it's time for a birthday party! 
-Lily
 
Linked up at some of the great blogs on my sidebar

Straight-Grain "Bias Tape" Tutorial


When I was finishing my son's birthday bunting banner, all the tutorials I found said I needed bias tape.  But, it's not always necessary to use bias tape.  You only need it when you have curves, or you want the finished project to bend/curve easily.  I think that many people use bias tape because it comes pre-packaged and they don't have to cut or press it, not because it's actually necessary to use a bias edge.

I used straight-grain "tape" for my banner, and it worked really well, even on the ties.  

This method has a couple of advantages:  
1.)  Bias tape is more expensive
2.) I finished this banner around midnight the night before the party and had no bias tape, but I could make the straight-grain version quickly.
Here's a quick tutorial on how I made my 1/2" straight-grain tape:

1.  Cut 1 1/2" strips from your fabric.  For 15' of tape, you'll need about 1/4 yd of fabric.  Sew these strips together along the short ends into one really long strip.  Press the seam allowances open.

2.  Press in all four edges 1/4".
3.  Press the strip in half.  Now, you have straight-grain tape that can be used in many different projects.

-Lily

Friday, October 26, 2012

Blogger's Quilt Festival: Blast Off! Rocket Ship Baby Quilt

This is my first time participating in the Blogger's Quilt Festival over at Amy's Creative Side, and I'm so excited!

I decided to share a super-fun rocket ship quilt.  It's one of my favorite quilts that I've made recently, because it combines wonky piecing, applique, and an outer space theme all in one vibrant, colorful quilt.


Sorry, I don't have pics of my creative process.  I'm a blogging newbie, and I made this quilt before I started taking tutorial pics.

First, I made the wonky panels, sewing strips to a muslin base.  I used a variety of space-themed, bright fabrics from my stash.  After I put the top together, I quilted a few star shapes.  Yes, you read it right, I basted and started quilting before I attached the applique.

I hand-cut the applique and attached it by machine, leaving raw edges, which I think adds to the fun/casual feel of this quilt.  The bonus of adding the applique at this step is that the applique stitching becomes part of the quilting, and it makes a picture on the backing.  I also did some fun angled quilting on the outer borders.


 I used the same outer-space fabric for the backing and binding, and I attached it by machine (I don't do much handwork.  That's why I have three sewing machines!)
Name:  Blast Off!
Quilt Measurements 37 x 32 inches 
Quilted by me, on my home sewing machine
Best category – Home Machine Quilted, Scrap Quilt, Baby Quilt
Quilt Festival entry #207


Wednesday, October 24, 2012

Weekend Dinner--Homemade Pizza

I think I've found the biggest problem with making homemade food--everyone loves it.  "What?  That's not a problem," you say.  The problem is that my husband likes my homemade foods too much-- he never wants to go out.  If I suggest we try out a new restaurant, he replies, "Why?  You're food is better anyway."  It's very flattering, but sometimes making everything homemade is exhausting.  This recipe is great because pizza is simple to make, so it's one of my go-to dinners for Friday nights.  

I usually make two large pizza, and we eat the leftovers on Saturday.  For two 16" pizzas with medium/thick crust, I triple the recipe below.


What you need  For one thick-crust 12" pizza:
  • 1 cup lukewarm water 
  • 2 1/4 tsp (1 pkg) active dry yeast
  • 1/4 tsp sugar
  • 1 Tbs oil
  • 3 cups all-purpose flour, divided
  • 1 tsp cornmeal 
  • Pizza sauce
  • 1 to 1 1/2 cups cheese
  • toppings--we like pepperoni, mushrooms, and bell peppers

Let's get cooking:
1.  Stir the sugar and yeast into the lukewarm water.  (The water should be the same temperature as your finger if you dip it in).  Let the yeast mixture sit 5 minutes until foaming.   It should start to look like the pic below.  Then add the oil.
2.  Measure 2 cups of flour in a medium mixing bowl.  Add the yeast mixture and stir until combined.  Work in additional flour, using your fingers if it gets too stiff to use a fork.  The dough should not be too sticky or too crumbly.  You may not need all the flour, so add a little at a time.

3.  Turn dough out onto a floured surface and knead about 50 times by hand.  The dough should be fairly smooth and elastic.  Form into a ball and place it into a clean mixing bowl.  Cover with a towel and let it rise until doubled.  (This usually takes about 30-60 minutes, depending on how warm my kitchen is.)

3.  While I'm waiting for my crust to rise, I prep the rest of my pizza.  I wash and chop the veggies, grate cheese, etc.  By the time I've finished all that, my crust is done rising.

4.  Preheat the oven to 450 degrees.  Sprinkle your pizza pan with cornmeal.  On a floured surface, roll out your pizza dough, then place it on the pizza pan.  Bake without toppings 8-10 minutes.

6.  Add sauce, toppings, and cheese, then bake 9-11 minutes until cheese is turning golden.
  Mmm, time to eat!
     -Lily

Linked up at some of the great blogs on my sidebar    

Monday, October 22, 2012

Easy Child's Apron Tutorial

I made this fun apron for my son's 2nd birthday a few months ago, and I want to share the tutorial because this apron is so cute for such a quick project!  I love this jungle print, too.  I found it at a garage sale last summer for $1 a yard. (I'm always trying to save money on sewing.)
 If you have some fat quarters lying around, you can even use those.  You only need three fat quarters to make this apron.  This apron fits approximately sizes 2T to 5T.  The neckband is adjustable, which allows this apron several years of use for your toddler/preschooler. 
What you need:
  • 1 piece main fabric, 21 x 17 inches
  • 1 piece backing fabric, 21 x 17"
  • 2 pieces for ties, 3 x 18"
  • 2 pieces for neckband, 3 x 11"
  • 7" square for applique letter
  • 6" piece of velcro
Let's Get Sewing:
1. Lay your main fabric and backing fabric right sides together. On a 17" edge, mark 4" in from each side.  Then mark 9" down on each side.  Line a ruler up with the two marks, and cut along this line.  You should cut off a triangle like in the photo below.  Then line up the ruler on the other side and cut off a second triangle.


2.  Now, make the ties and neckband.  For both ties, press in one short edge 1/2".  Press in both long edges 1/2", then fold in half and pin.  Repeat for the two neckband pieces.


3.  Topstitch 1/8" from the edge on three sides of all four pieces, leaving the unpressed short ends open.
Now, sew the velcro to the neck ties, close to the topstitched end.  (My velcro is different lengths, but yours should be the same length.  I dug these pieces out of the scrap pile).

4.   Lay your main fabric and backing fabric right sides together, and fold down the backing at the top.  Pin your neck ties at the top edge, about 5/8" away from the diagonal edges.  Make sure that you have one piece of velcro facing you and one facing away, or the velcro won't match without twisting the straps.  Refer to the photo below.
Then fold the backing fabric over of the neck ties and pin the main fabric and backing together.  The neck straps should be pinned between the main fabric and the backing.


5. Pin the waist ties just below the diagonals, in between the two apron pieces.  Line up the open end with the edges of the apron pieces.

6.  Sew around the edge of the apron with a 1/2" seam allowance, leaving 5" open for turning.  Turn out and press flat, then topstitch around the whole apron 1/4" from the edge, closing the turning opening.

7.  Hand-cut your child's initial from the 7" square.  I simply pinned the letter on the apron and topstitched 1/4" from the edge around the "E", leaving the edges raw for a frayed look.

That's it!  Enjoy making messes with your little one :)
Lily

Wednesday, October 17, 2012

Birthday Boy Rainbow Cake

We had a birthday party last week, and what's a 1st birthday without an awesome cake?  I saw the idea for a rainbow cake on Pinterest, and I thought it would be so fun for the birthday boy to eat smash.

To complete the fun, I also made a rainbow fabric chain and a "Happy Birthday" banner to decorate at the party.                                                                     
I obviously didn't get my rainbow layers perfect--oh, well.  It still turned out awesome!

I decided to decorate the outside very simply to let the rainbow colors inside really shine.  I used plain white frosting and added a ring of rainbow sprinkles on top.
     What you need:
  • 3 box cake mixes (white)
  • 6 mixing bowls
  • food coloring 
  • 9" round cake pans (3)
  • cake leveler
  • 3 recipes white buttercream frosting (such as Wilton's buttercream)
  • rainbow sprinkles, decorating bag and tips
Let's Get Baking:
1.  Prepare the cake mixes as directed on the box.  Divide into six separate bowls.  Use the food coloring to dye each bowl a different color.  I used concentrated gels to get bright colors. 

2.  Grease the bottom and sides of the pans.  Trace around the bottom of the pans on parchment paper and cut out three circles.  Lay one parchment paper circle in the bottom of each pan.  (This helps the cake to slide out easier after baking).  Pour in one color in the bottom, then carefully layer a 2nd color on top.  Try to evenly distribute the 2nd color, or you won't get nice layers.

For my three pans, I used:  yellow/orange; red/purple, and blue/green. 

You may not need all of the batter that you prepared, so you can use the extra to make rainbow cupcakes!

3.  Bake the cakes as directed on the box--since I used an entire cake mix in one pan, I had to bake it longer than directed.  Let it cool about 5-10 minutes in the pan.  Carefully loosen around the edge with a spatula, then let it cool completely on a wire rack.

4.  When the cake is completely cool, use a cake leveler to level the top.  Then, cut the cake into two layers.  Theoretically, it should be one purple and one red layer in the picture, but you can see that I didn't get my layers perfect.
 I cut out a parchment paper circle and laid it between the layers, put both layers back in the cake pan, and wrapped the whole pan in plastic wrap.  Then I froze the cake for a day.  This step is optional, but it really helps when decorating to start with a cold cake.  Make sure to remove the parchment paper from the bottoms before assembling.

6.  I assembled the cake starting at the bottom, with a layer of frosting between each color:
top: yellow
orange
red
purple
blue
bottom: green

6. I used plain white frosting to ice the outside.  Then I used white icing to pipe a shell border on the bottom.  Then I carefully added a ring of rainbow sprinkles on top.
Cutting the cake--yay, success!  Enjoy your rainbow birthday cake :)
-Lily


Monday, October 15, 2012

Pumpkin-Apple Muffins

Autumn is here, which means it's pumpkin and apple season.  Mmm, these muffins combine both fall flavors into one yummy treat.  And, they're healthy--they have whole wheat flour, fruit (apple), even a veggie (pumpkin).  Who knew all the food groups could fit into a little muffin?

I like to make a big batch and freeze them in ziploc bags.  Then I just pop two or three in the microwave when we eat breakfast.

What you need: for 24 muffins
  • 1 cup all-purpose flour
  • 2 cups whole wheat flour
  • 1 cup packed brown sugar
  • 1 Tbs pumpkin pie spice
  • 1/4 tsp cloves
  • 2 tsp baking powder
  • 1/2 tsp salt
  • 1 can pumpkin
  • 1 cup milk
  • 2 eggs
  • 1/2 cup canola oil
  • 1/2 cup applesauce
  • 1/2 cup honey
  • 1 apple, peeled, cored, and chopped into 1/4" pieces
Let's get cooking:
  1.  Preheat oven to 375 degrees.  Grease bottoms of 24 muffin cups.
  2. Combine flours, sugar, spices, baking powder, and salt in a large mixing bowl.  
  3. Combine pumpkin, milk, eggs, oil, applesauce, and honey in a 2nd mixing bowl.  Add to flour mixture, stirring just until moist.  Fold in chopped apple.
  4. Spoon batting into muffin tins (about 2/3 full).  Bake at 375 for 18-20 minutes or until muffins spring back when touched lightly in center.
  5. Cool muffins in pan 5 minutes, then remove from pan.  Cool completely in a wire rack.
  6. Freeze in ziploc bags for up to 2 months.

Enjoy!
-Lily