Showing posts with label dessert. Show all posts

Wednesday, December 26, 2012

Easy-Peasy Cake Mix Cookies

Christmas might be over, but the holiday season is in full swing for us.  Our family still has several more parties over the next few days.  If you need something quick and easy to bake for a holiday get-together, these are the cookies for you!  They're super yummy, super easy, and fast.  Since you start with a boxed cake mix, you don't have to measure out flour, salt, baking powder, etc, which can save a lot of time.  And another bonus:  there's just one dirty bowl, rather than piles of dirty dishes.

What you need: (makes about 3 dozen)
  • 1 (2-layer) devils food cake mix
  • 8 oz package reduced fat cream cheese
  • 1 stick margarine
  • 1 egg
  • 1/2 tsp vanilla
  • powdered sugar

 Let's get Cooking:
1.  With a hand mixer (or by hand) cream the margarine and cream cheese together.  Add the cake mix, egg, and vanilla and mix until combined.  (Sometimes my dough is a little crumbly at this point.  Just add a splash of milk to help it stick together.)

2.  Roll the dough into 1 inch balls.  Roll the balls in powdered sugar just before baking.

3.  Bake in a preheated oven at 350 degrees for 12-15 minutes.  (Make sure not to overbake.  It's easy to do with chocolate cookies because you can't see them turning golden brown)
Mmmm, I can almost taste them now.  Enjoy, and Merry Christmas!
-Lily

Linked up at some of the great blogs on my sidebar.

Thursday, November 8, 2012

Homemade Brown Sugar

Who knew you could make brown sugar at home??

It's always exciting when I learn how to make something homemade.  And last week, I found the book The Homemade Pantry by Alana Chernila at the library.  There are a ton of great recipes to explore, and I'm sure I'll try several more.  The first one that caught my eye was homemade brown sugar.  It's never even crossed my mind that I could make it at home.  Apparently, it only takes two ingredients and takes about a minute.

Why have I been paying twice as much for brown sugar than for white sugar??  No more!  I have crossed another processed item off my grocery list :)

What you need:
  • 1 cup white sugar
  • 2 tsp unsulphured molasses
 (yes, that's really all you need)

Pour the molasses over the sugar. 

Fluff with a fork until it is all mixed in.  At first it looks like you've ruined your sugar, and it's all clumpy.

Don't worry.  Keep going, and in a minute you'll have brown sugar.
I've been using this for months in my recipes, and it tastes and acts the same as store-bought brown sugar.

-Lily

Linked up at some of the great blogs on my sidebar!

Wednesday, September 19, 2012

Homemade Chocolate Frosty


My husband found this recipe to make a Wendy's chocolate frosty at home--yummy!  I got a Cuisinart ice cream maker for my birthday and we've been on the lookout for great recipes to make with it.  This frosty recipe is delicious--it tastes just like going to Wendy's!
 I tried to restrain myself and just have this little cup.  But, I went back for seconds...

What you need:  For 6 servings (or 4 large servings if you eat waaaay too much ice cream, like me)
  • 3 3/4 cups whole milk  (I tried using an even 4 cups, and it overflows my Cuisinart)
  • 1/2 can sweetened condensed milk--eyeball it
  • heaping 1/3 cup Homemade Chocolate Syrup (about 6 Tbs)

Lets get cooking:
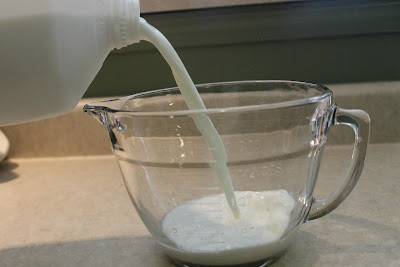
Pour in milk.


Add sweetened condensed milk.

Add chocolate syrup.

Whisk together.  Let it chill in the fridge for a couple hours.

Pour into your ice cream maker and wait 25 minutes.

It's ready!  I forgot my own advice and used 4 cups of milk = overflow!

This tastes best when eaten right away, or within a few hours.  But, it will save several weeks in the freezer in an airtight container.  (I don't actually know that from personal experience, since I always eat it all within a day or two). 

-Lily

Friday, September 7, 2012

Homemade Chocolate Syrup

Ever since I started staying home a few years ago, I've slowly been eliminating processed foods from our family's pantry and replacing them with homemade versions.  There are lots of positives to making things homemade.  My versions are usually cheaper, healthier, and tastier!  

The only negative I can really think of is the alarming number of dirty dishes I can generate during a cooking marathon.  I've started to take care of that problem by brain-washing my two-year-old son into thinking dishes are a super fun privilege he gets to help with.

Next up on the processed food chopping block:  chocolate syrup.  Now we'll never have to buy a bottle of too-expensive, cocoa-flavored corn syrup ever again!

What you need:
  •  1/2 cup water
  • 1/3 cup cocoa powder
  • 2/3 cup sugar
  • sprinkle of salt
  • 1/2 tsp of vanilla (oops, I left this out of my cute ingredient pic)
    Let's get cooking:

    Whisk all ingredients together in a small saucepan over medium heat.  Bring to a boil, then reduce heat to medium-low. If you need to, reduce heat to low.  You want your syrup gently simmering, not boiling.  Simmer for 20-25 minutes until thickening.  Stir every few minutes so it doesn't burn to the bottom of the pan.
    l
    Too many bubbles = burnt.  Too few = takes forever to thicken
    Don't worry if it seems a little too runny, it will thicken as it cools.  Store in the fridge in a squirt bottle.  (I used an empty salad dressing bottle that I washed several times so my syrup doesn't become chocolate-ranch flavored.)  I've stored it up to a month without any problems.

    -Lily