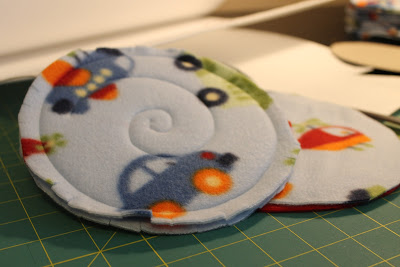
What you need: (for one frisbee)
- 2 fleece circles approximately 7 inches in diameter. I used a handy plastic lid as my template.
- 1 circle of Peltex sew-in ultra firm stabilizer, 1 inch smaller in diameter than fleece.
- Optional: Six or more 4 inch lengths of ribbon
1. Cut edges of fleece circles every 3/4 inches, about 3/8 inch cuts. This gives the frisbee a rag-quilt look.
2. Place fleece right-side down, with stabilizer on top. There should be about 1/2 inch of fleece showing all around.
3. Place 2nd fleece circle right-side up on top of stabilizer and pin in place. If you are using ribbons, knot or burn the ends so they don't fray. Pin in place around the frisbee, making sure that the ends are about 1" in from the outer edge and will be secured when you sew around.
4. Sew around the frisbee with a 1/2 inch seam allowance. I like to backstich over the ribbons to make sure they're secure.
5. If you want, add some extra topstiching so they look super-cute. I added a spiral to one and a square-within-a-square to the other.
-Lily


Great idea!!
ReplyDelete